BUILD
You’ve built and tested the Hardware. You’ve introduced yourself to PyCKBot, and seen how it can Control the servos that will make your robot move. Now let’s build a body for those guts and get walking.
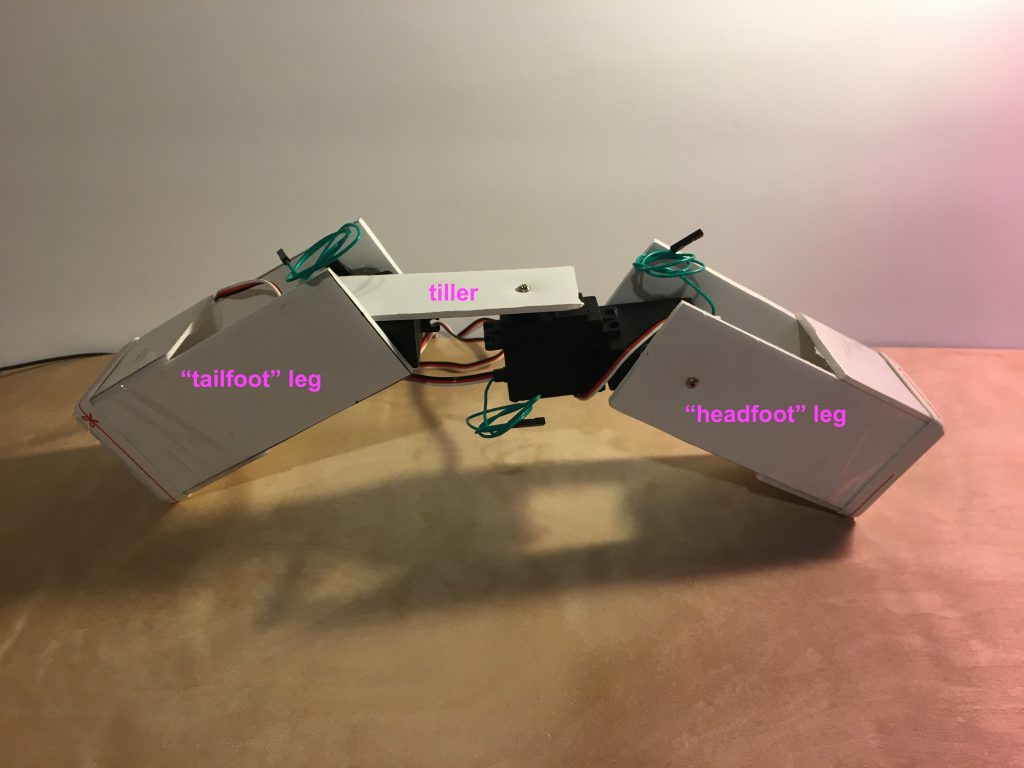
The “body” of your inchworm is simple, composed of a pair of legs—the “headfoot” and “tailfoot”—and a “tiller” that joins its two halves so it can turn.
You Will Need
- A marker
- A hobby knife
- Packing tape
- 1/8″-thick foamcore
- A hot glue gun with glue sticks
- A pair of wide rubber bands
- 3x servo “horns” (the “gear-like” plastic doohickeys that came with your servos)
- 3x long screws that came with your servos
Making the Body Parts
- First measure and cut out the following pieces of foamcore:
- 4 rectangles, each measuring 2″-by-5″ (the “legs’ sides”)
- 1 rectangle measuring 1.25”-by-4” (the central “tiller”)
- 2 rectangles, each 2” by 6” (these will become the “walking surfaces” of each leg)
- Set aside the leg sides and tiller.
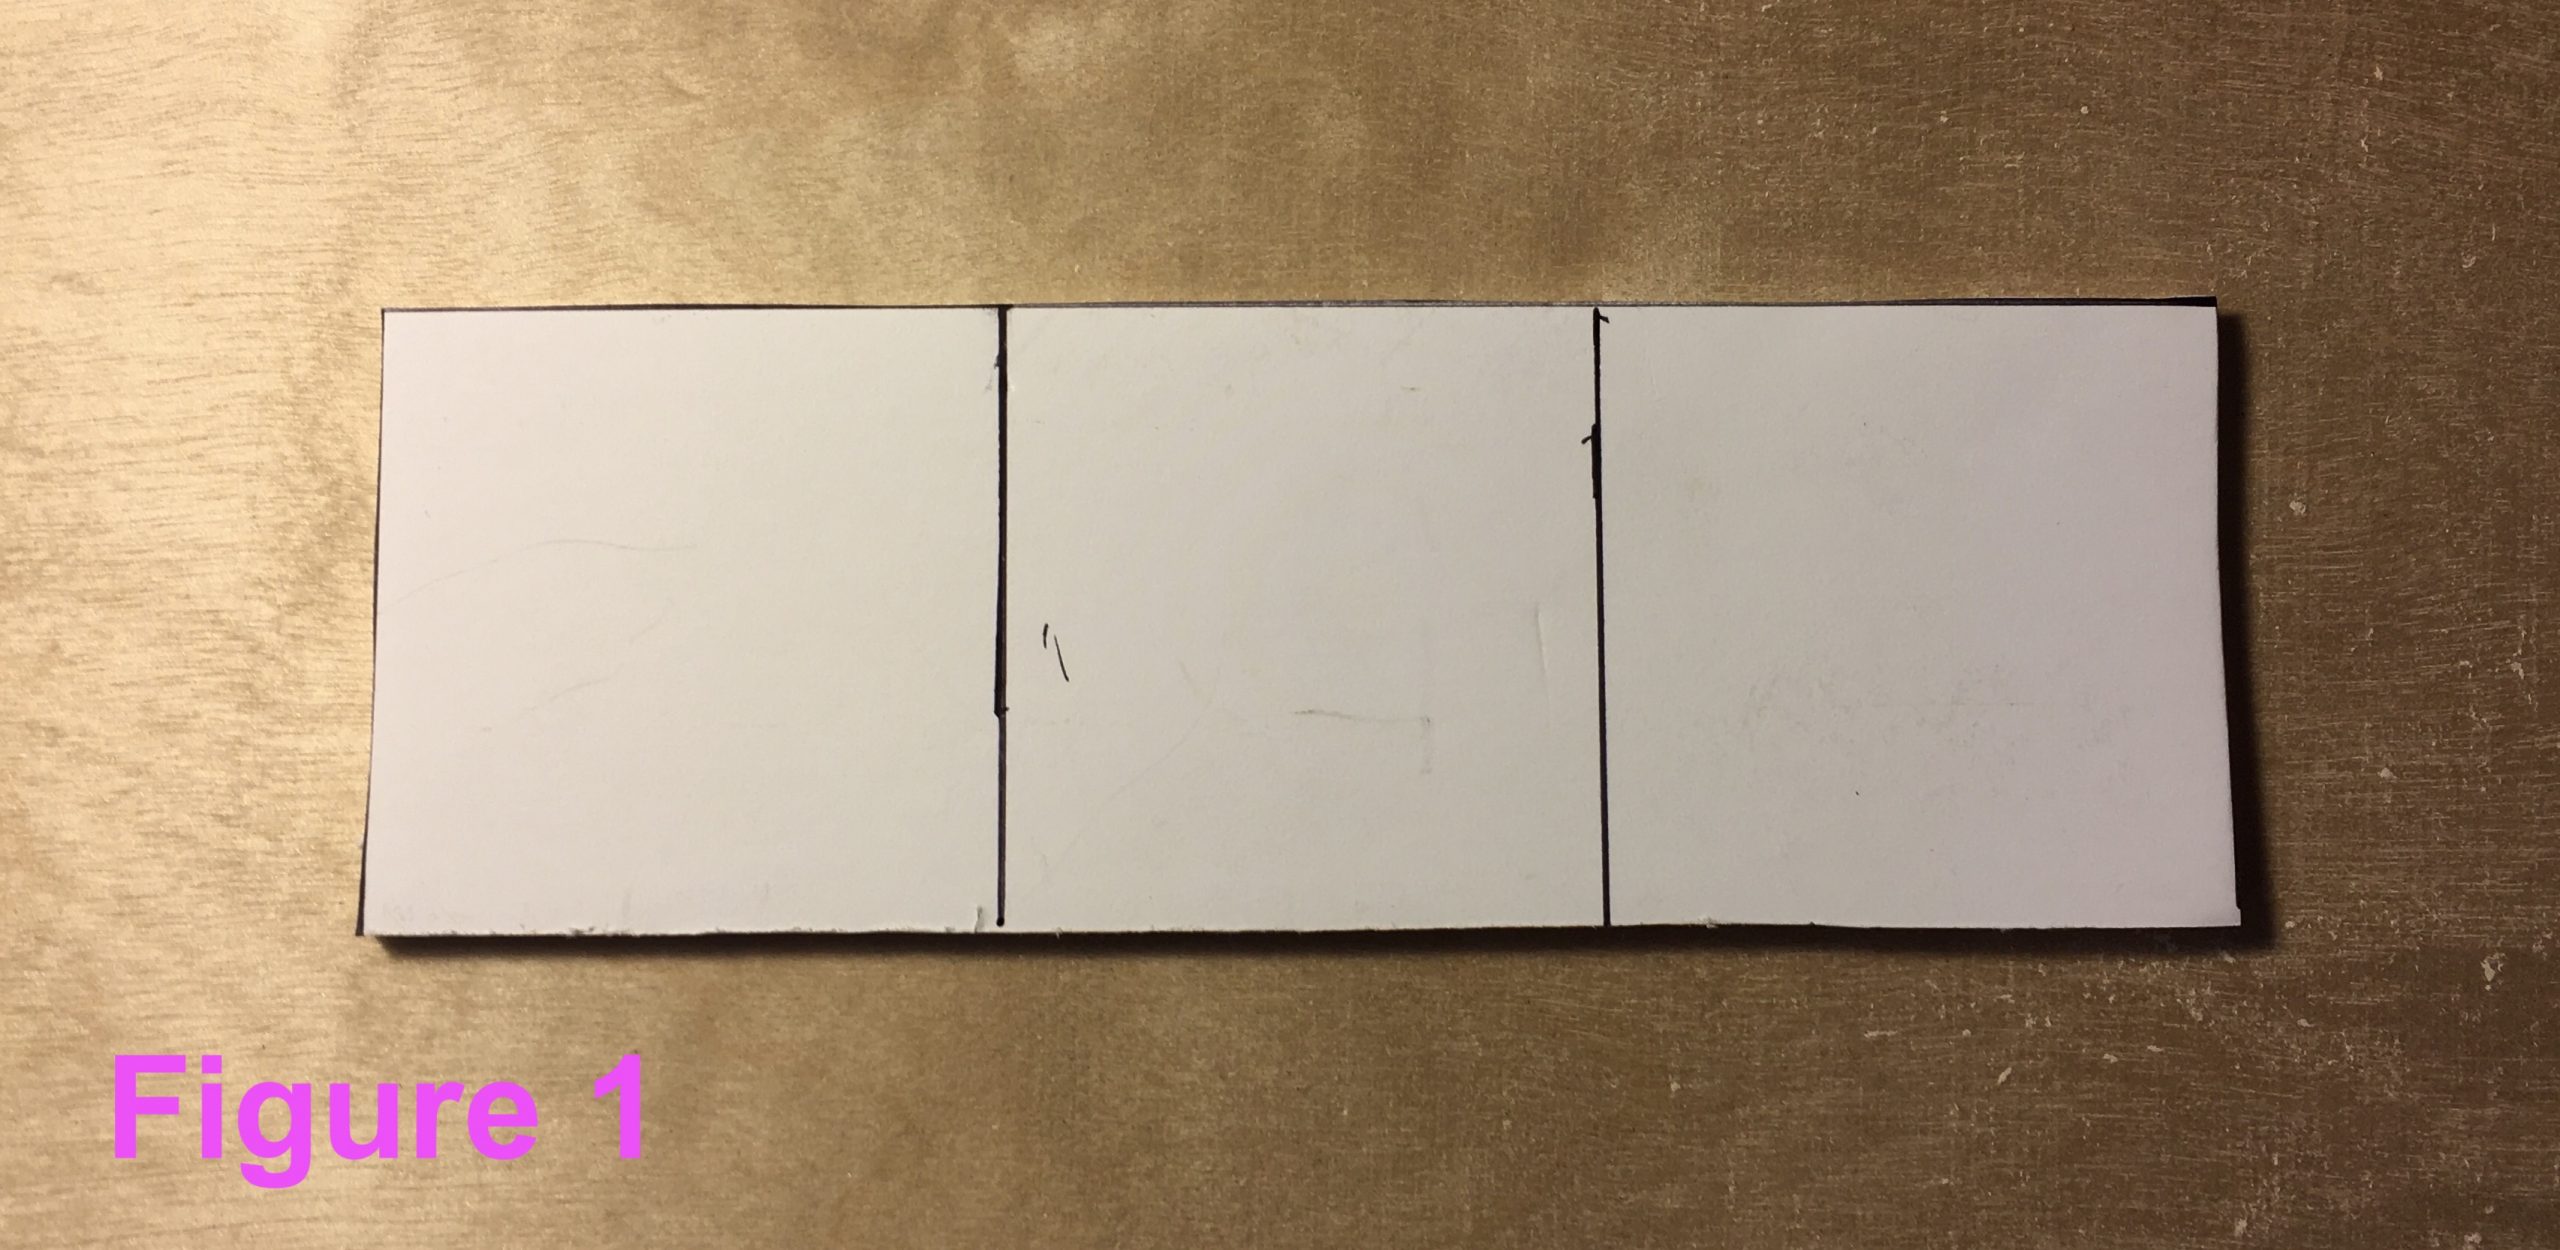
- Take each 2″-by-6″ walking surface piece and draw lines dividing it into a row of three 2”-by-2” squares (see Figure 1)
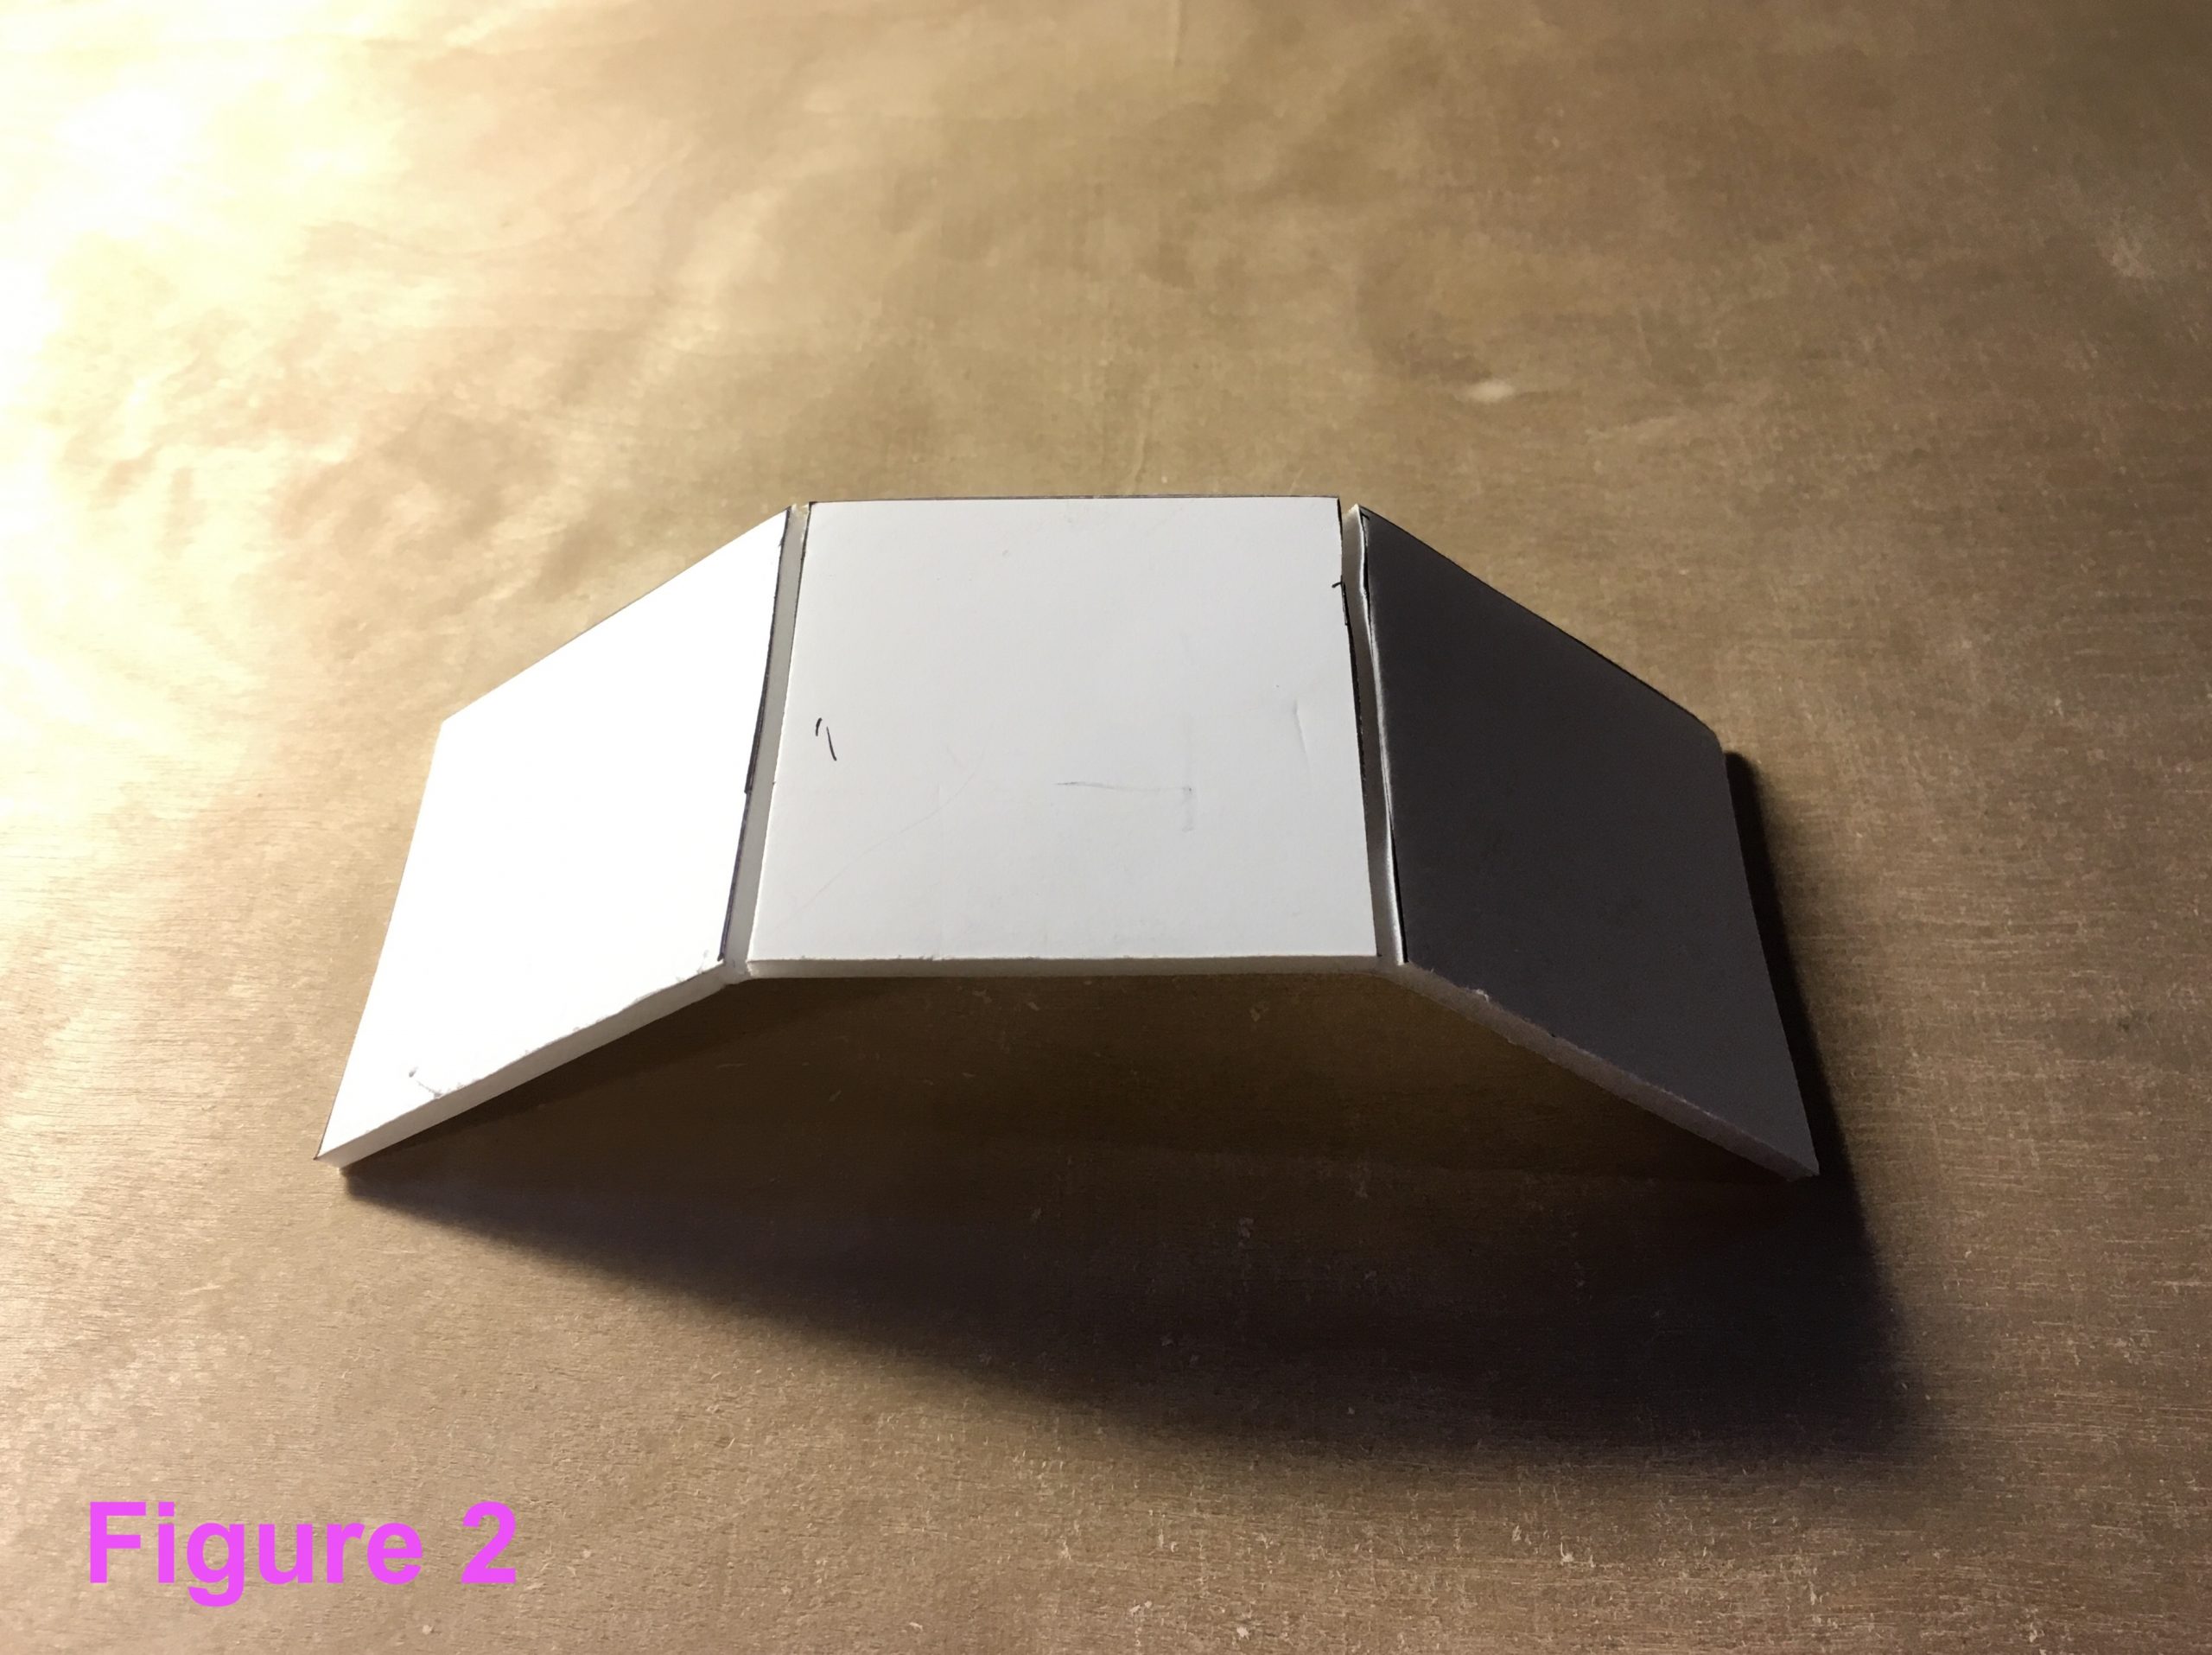
- Using your hobby knife, carefully cut halfway into the foam core at each 2” mark. The result should be something like the “trifold” piece shown in the Figure 2 below.
- Add a piece of reinforcing packing tape down the length of the “inside” (i.e., uncut) side of the trifold walking surface
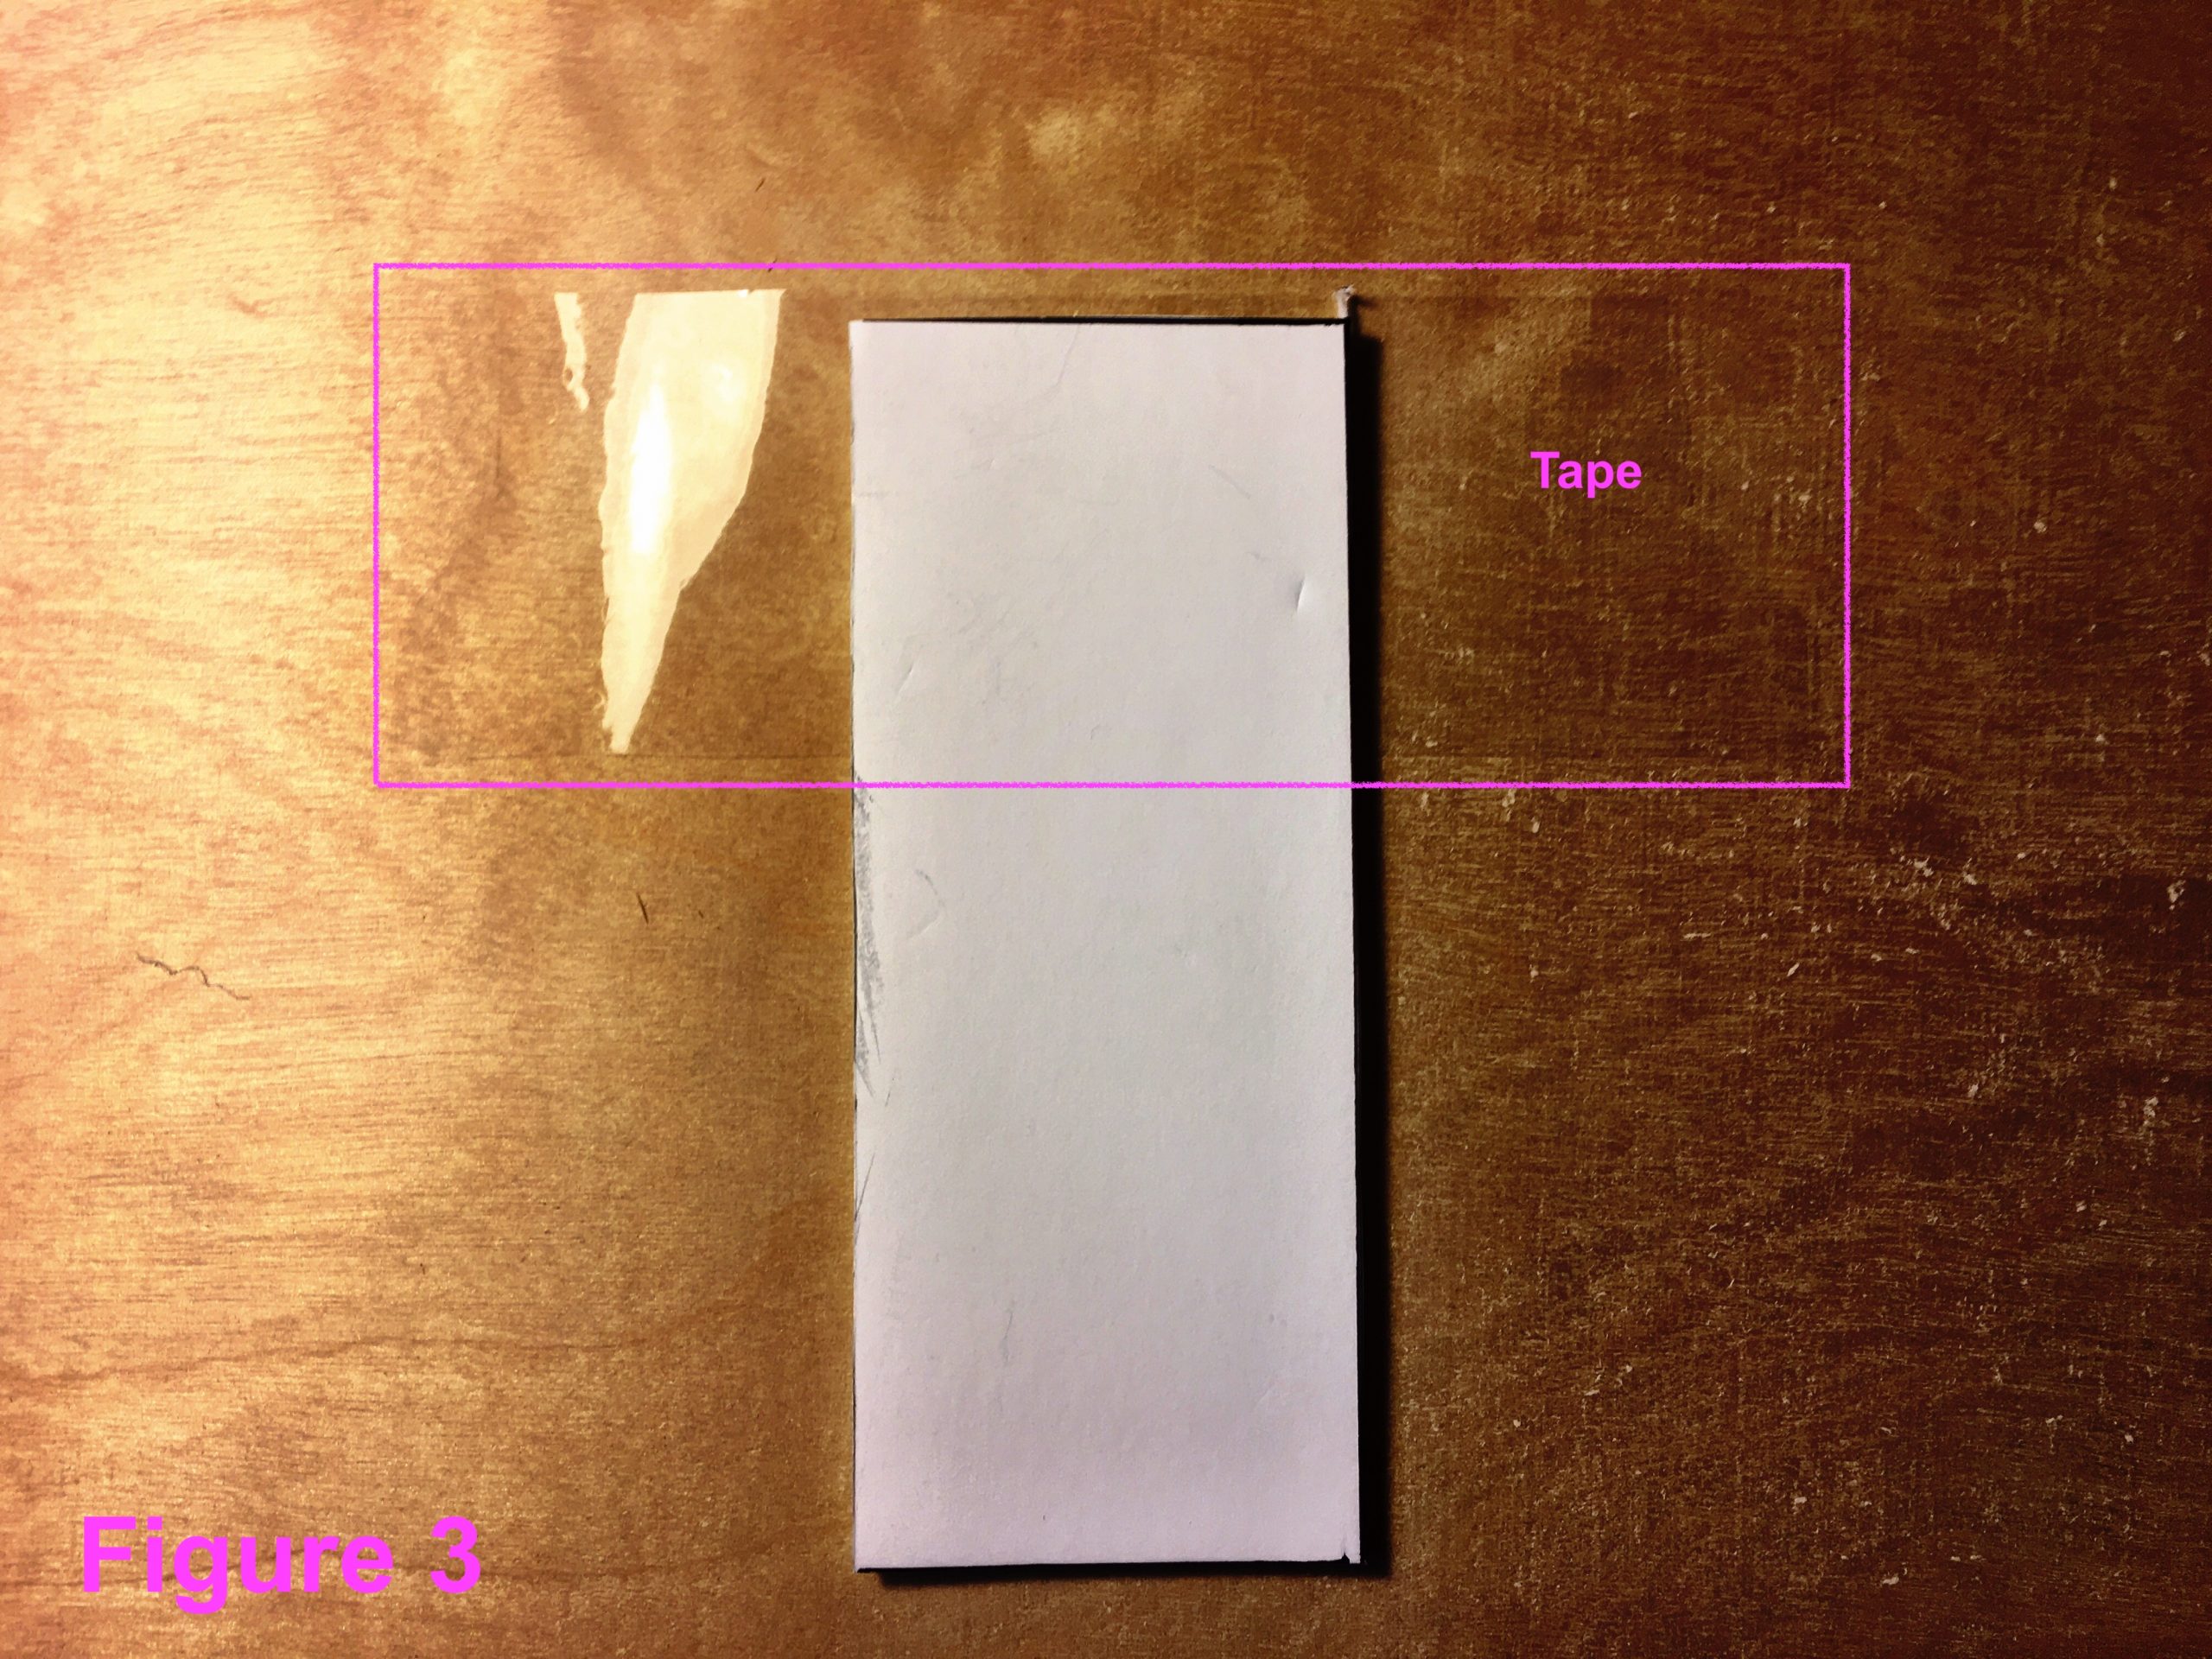
- Now assemble each leg. Start by laying a ~5” strip of packing tape on your worktable, sticky side facing up. Place one leg side on the tape so that it forms a “T”. Note that about 1/8th of an inch of tape overhangs the top of the foamcore (see Figure 3)
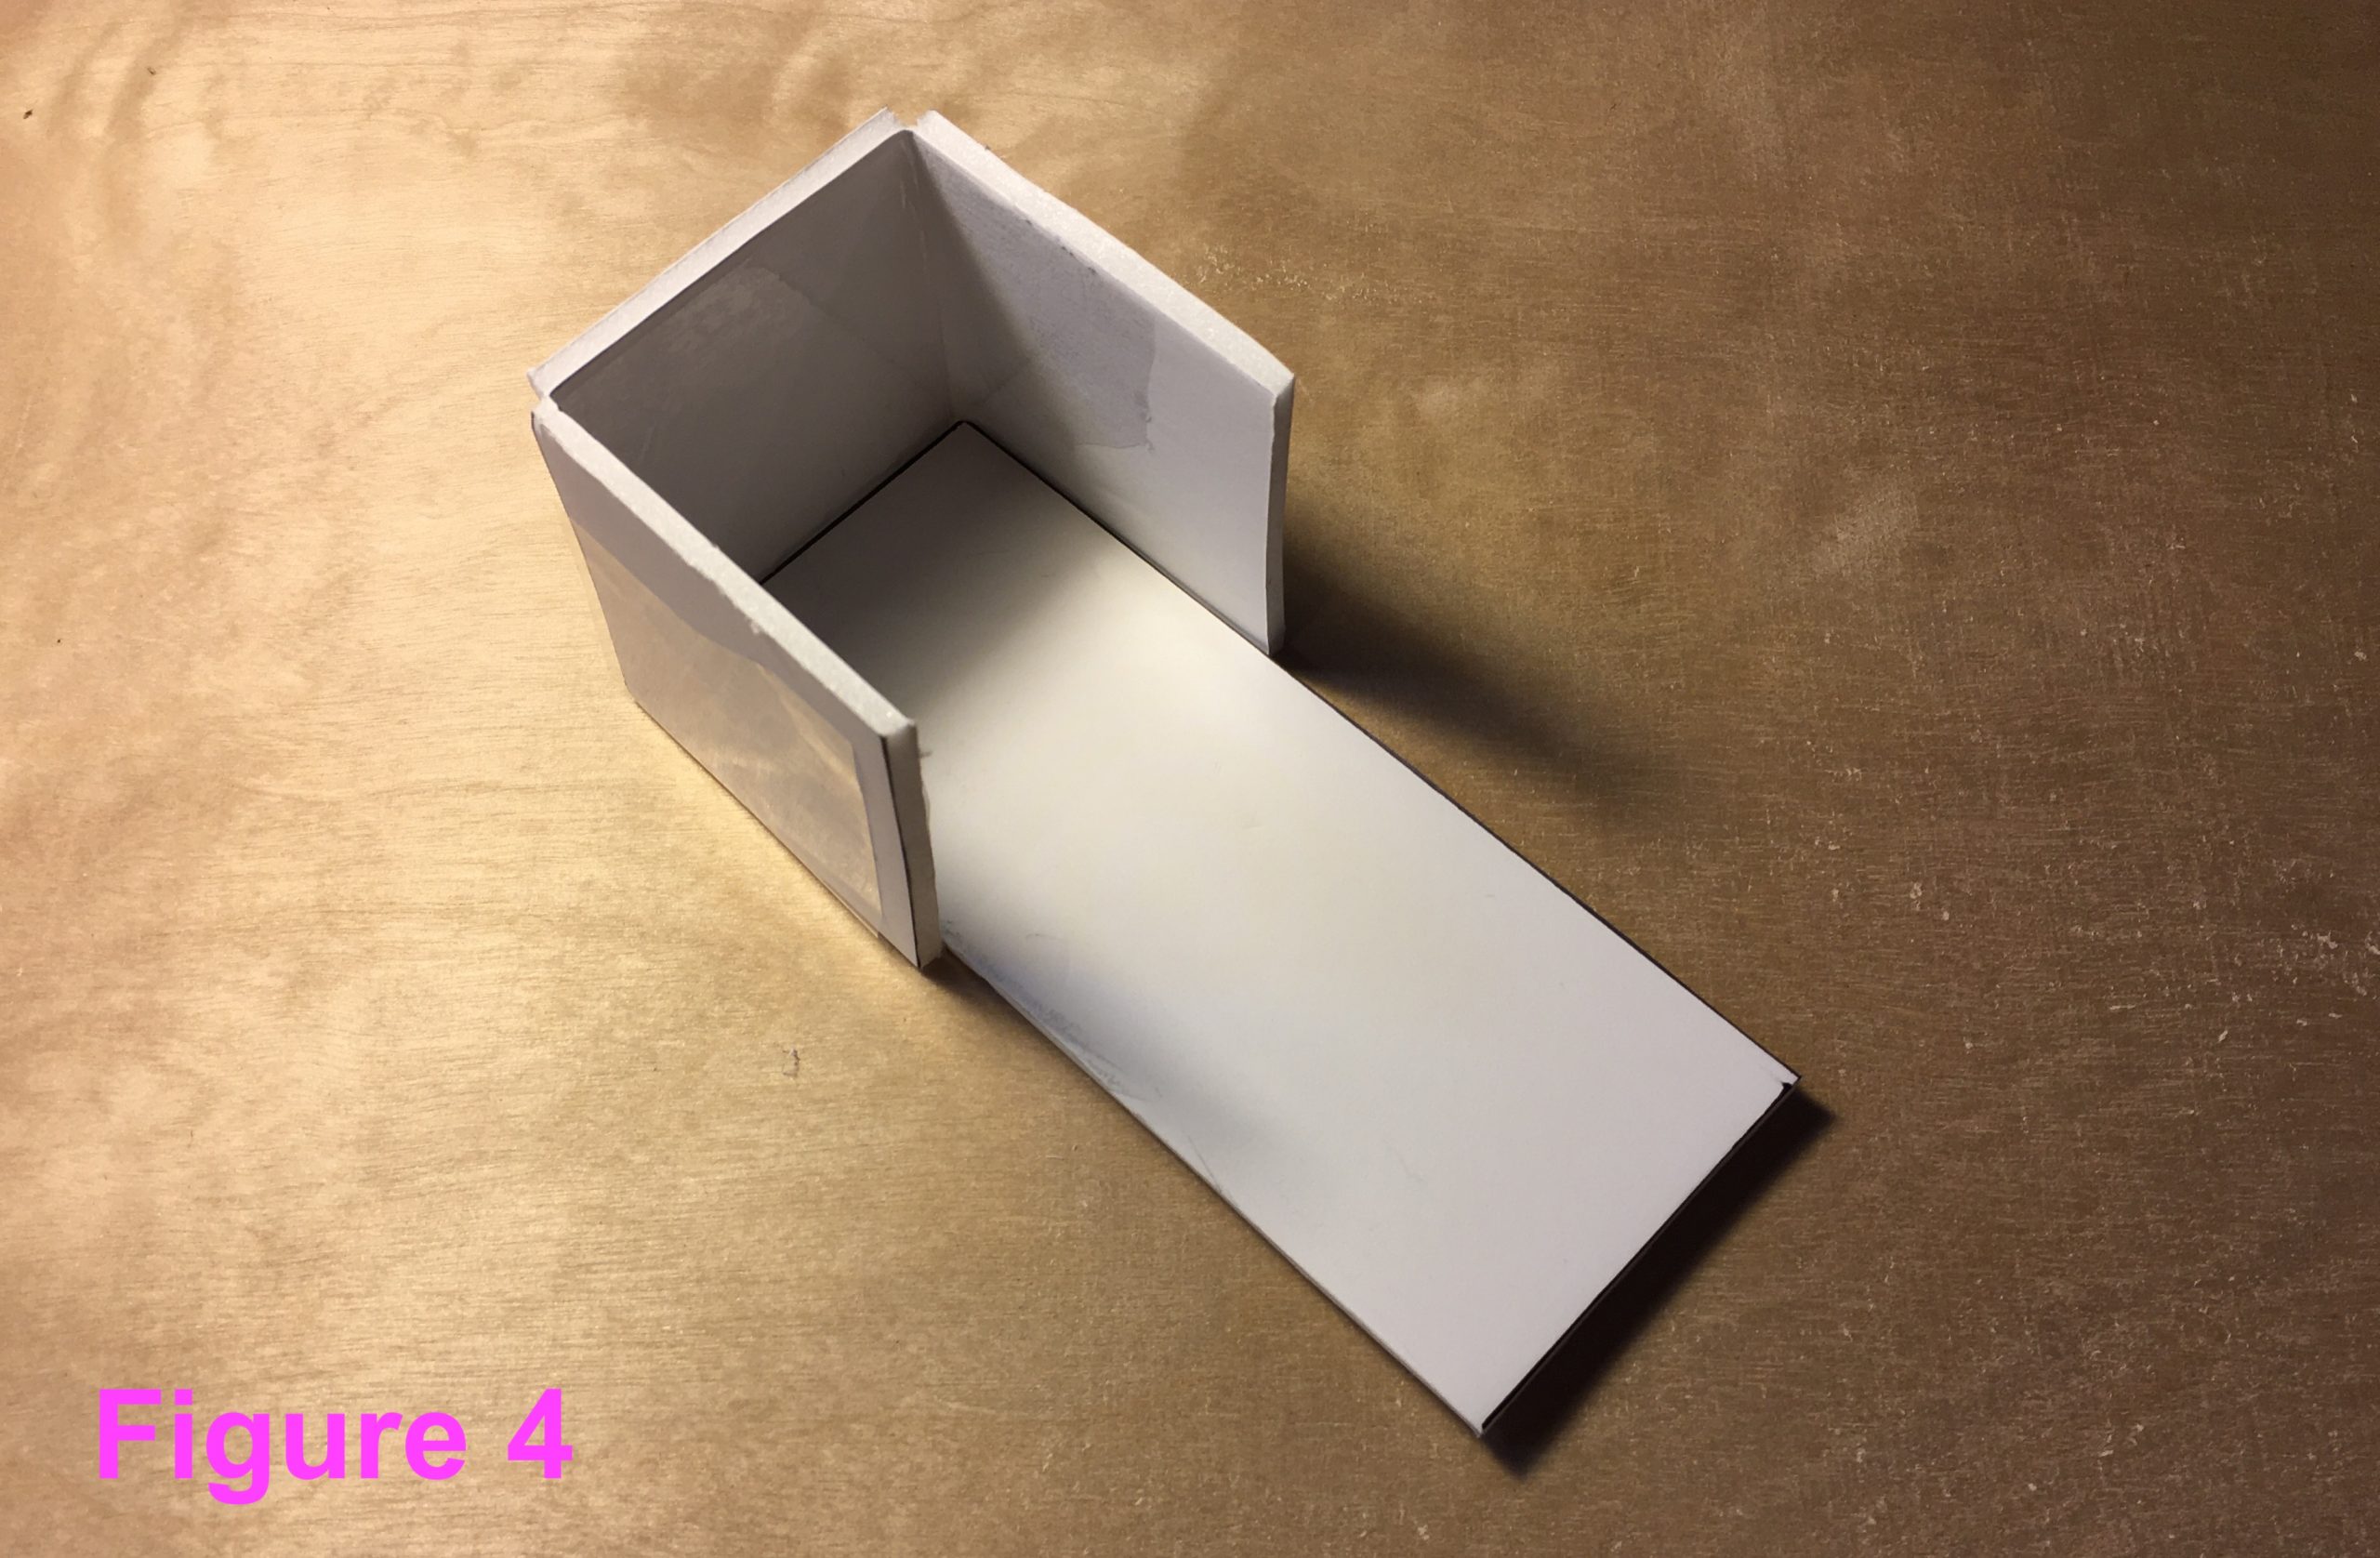
- Wrap one of the foamcore walking surfaces you made in Steps 3–5 around the end of the foamcore leg side, then secure it in place with the packing tape (as in Figure 4).
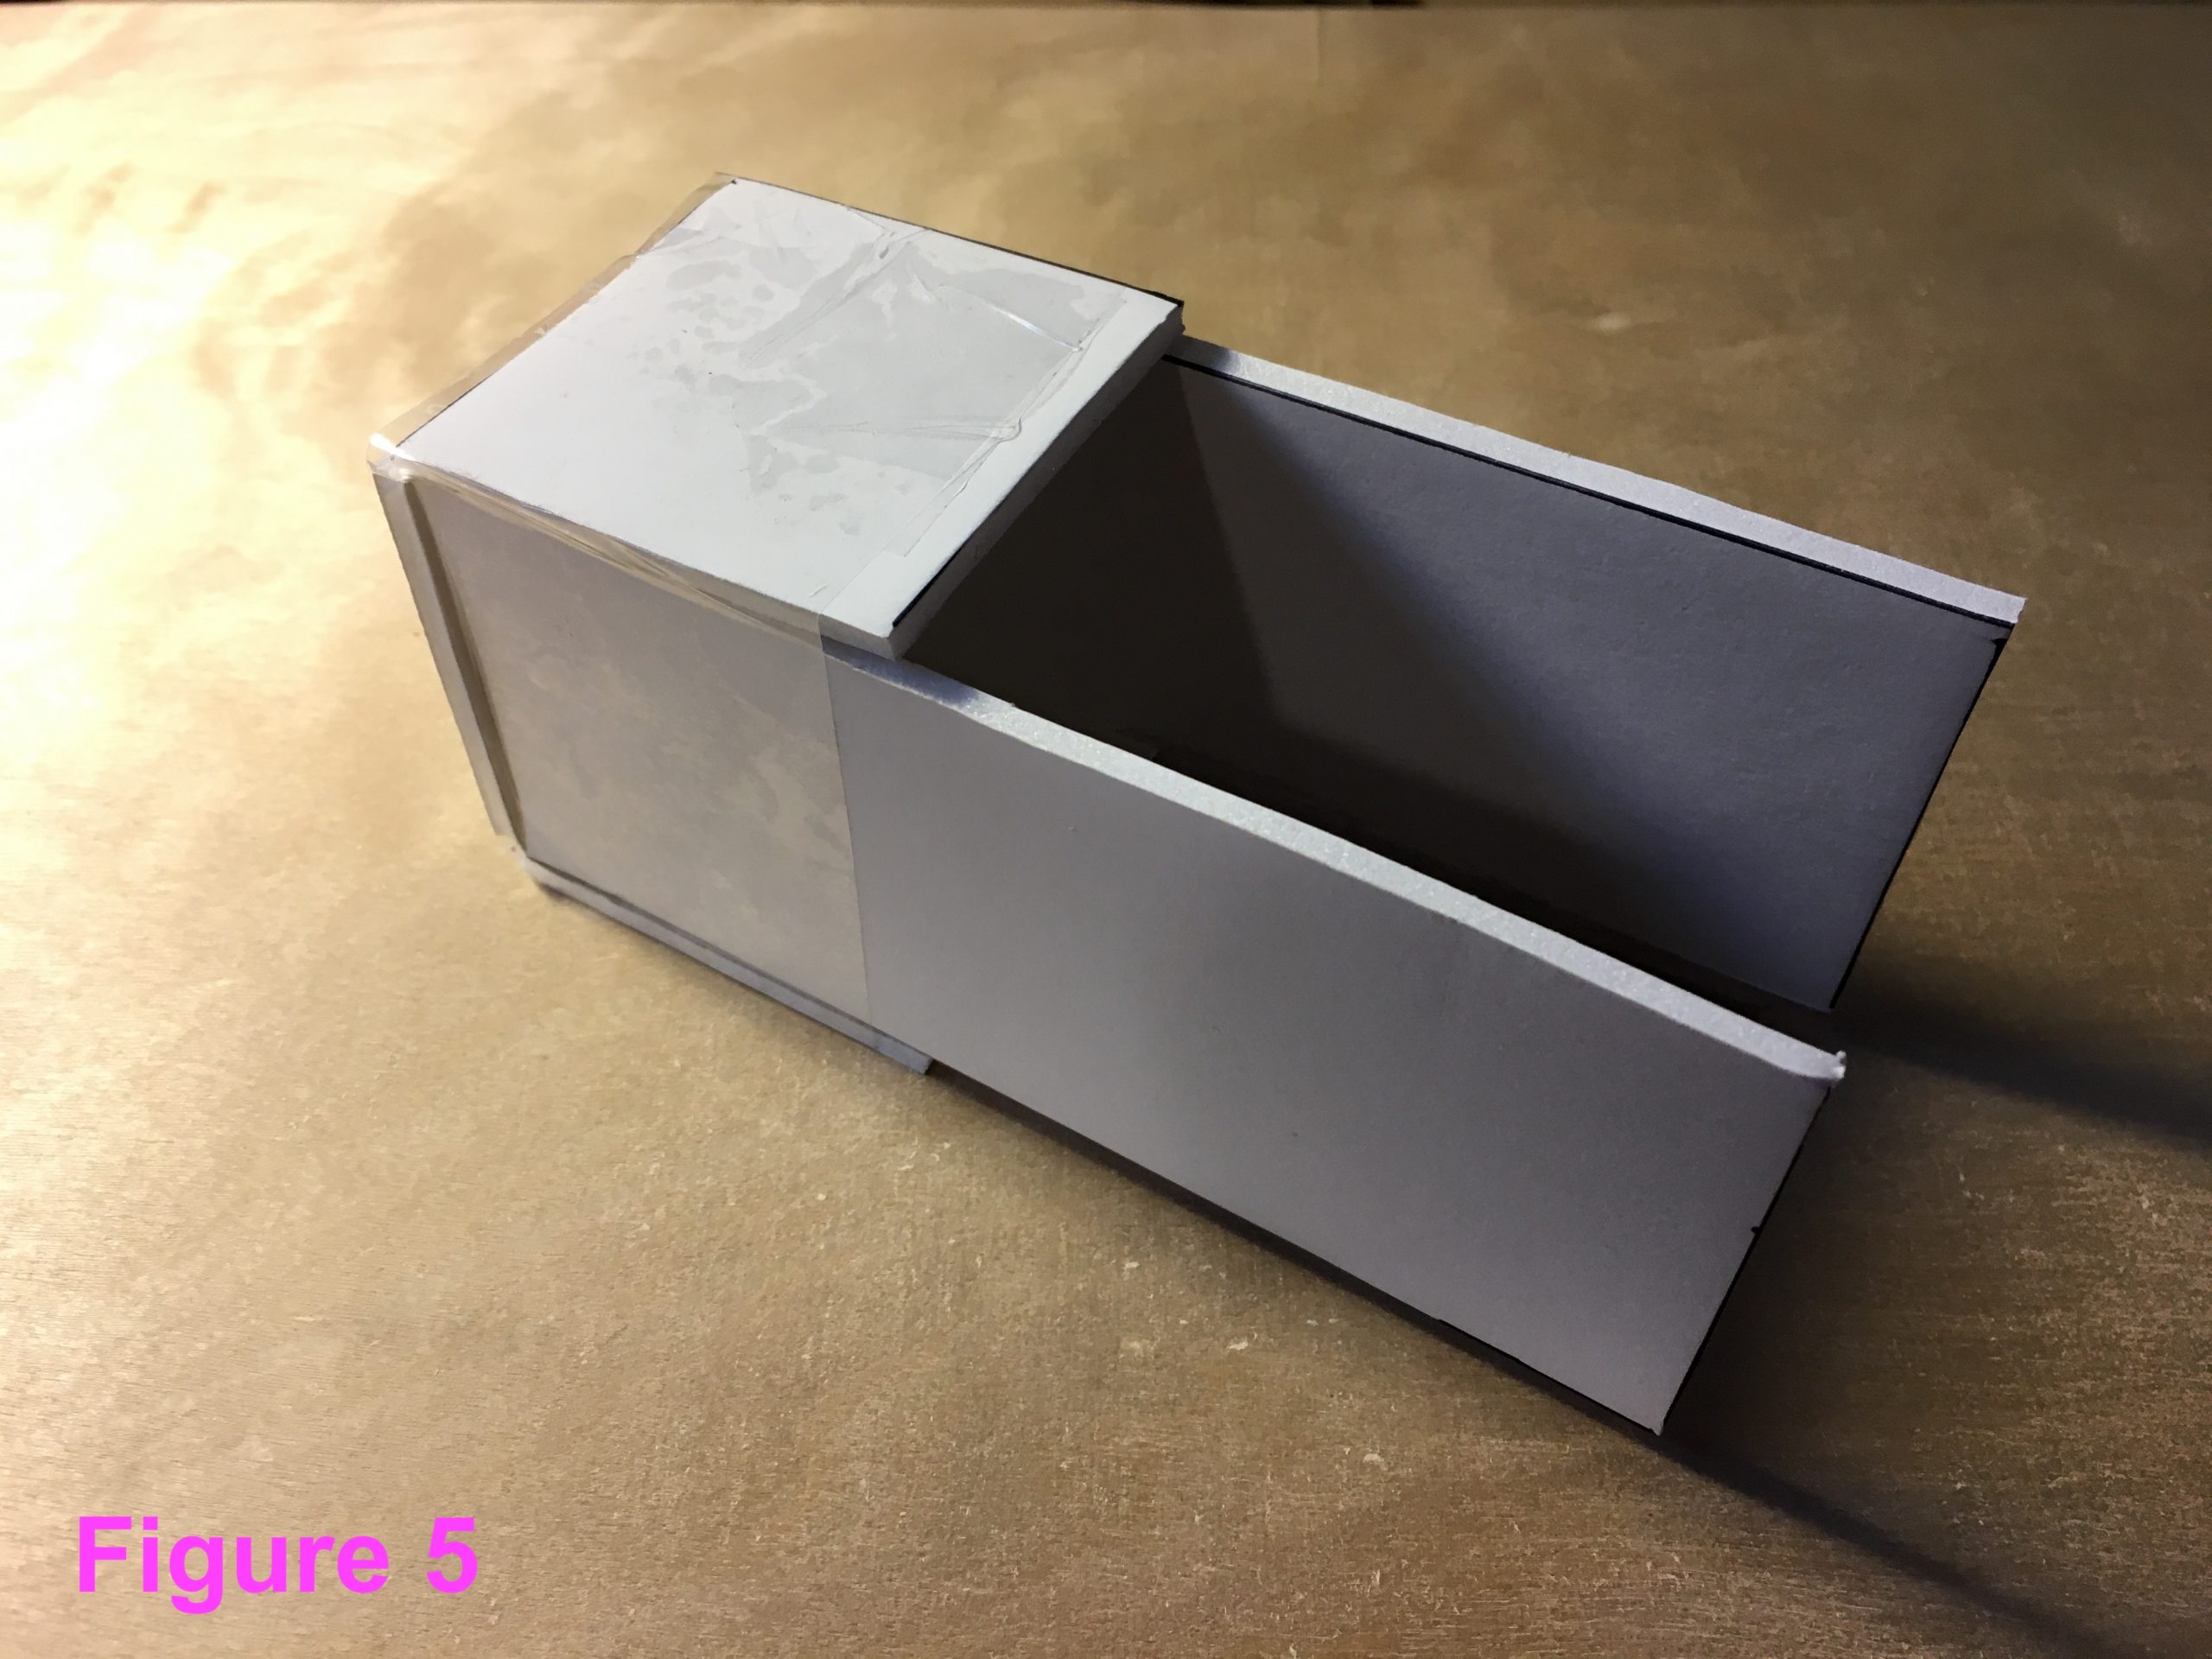
- Next, lay a second 5” length of packing tape on your worktable, sticky-side up. Lay another foamcore leg side piece on the tape, again forming a “T”. Take the side-and-surface assembly (constructed in Steps 6 and 7) and cup it around the end of the side piece (see Figure 5). Use the packing tape to secure this side to the assembly. Finally, give that entire end of the leg a reinforcing wrap of tape. Your first leg is complete.
- Repeat these steps with the remaining walking surface and leg side pieces to construct the other leg.
- (optional) Wrap a rubber band around the “toe” of each leg; this will give it better traction on smooth surfaces. (You can see the white rubber bands on the finished Inchworm shown at the top of this page.)
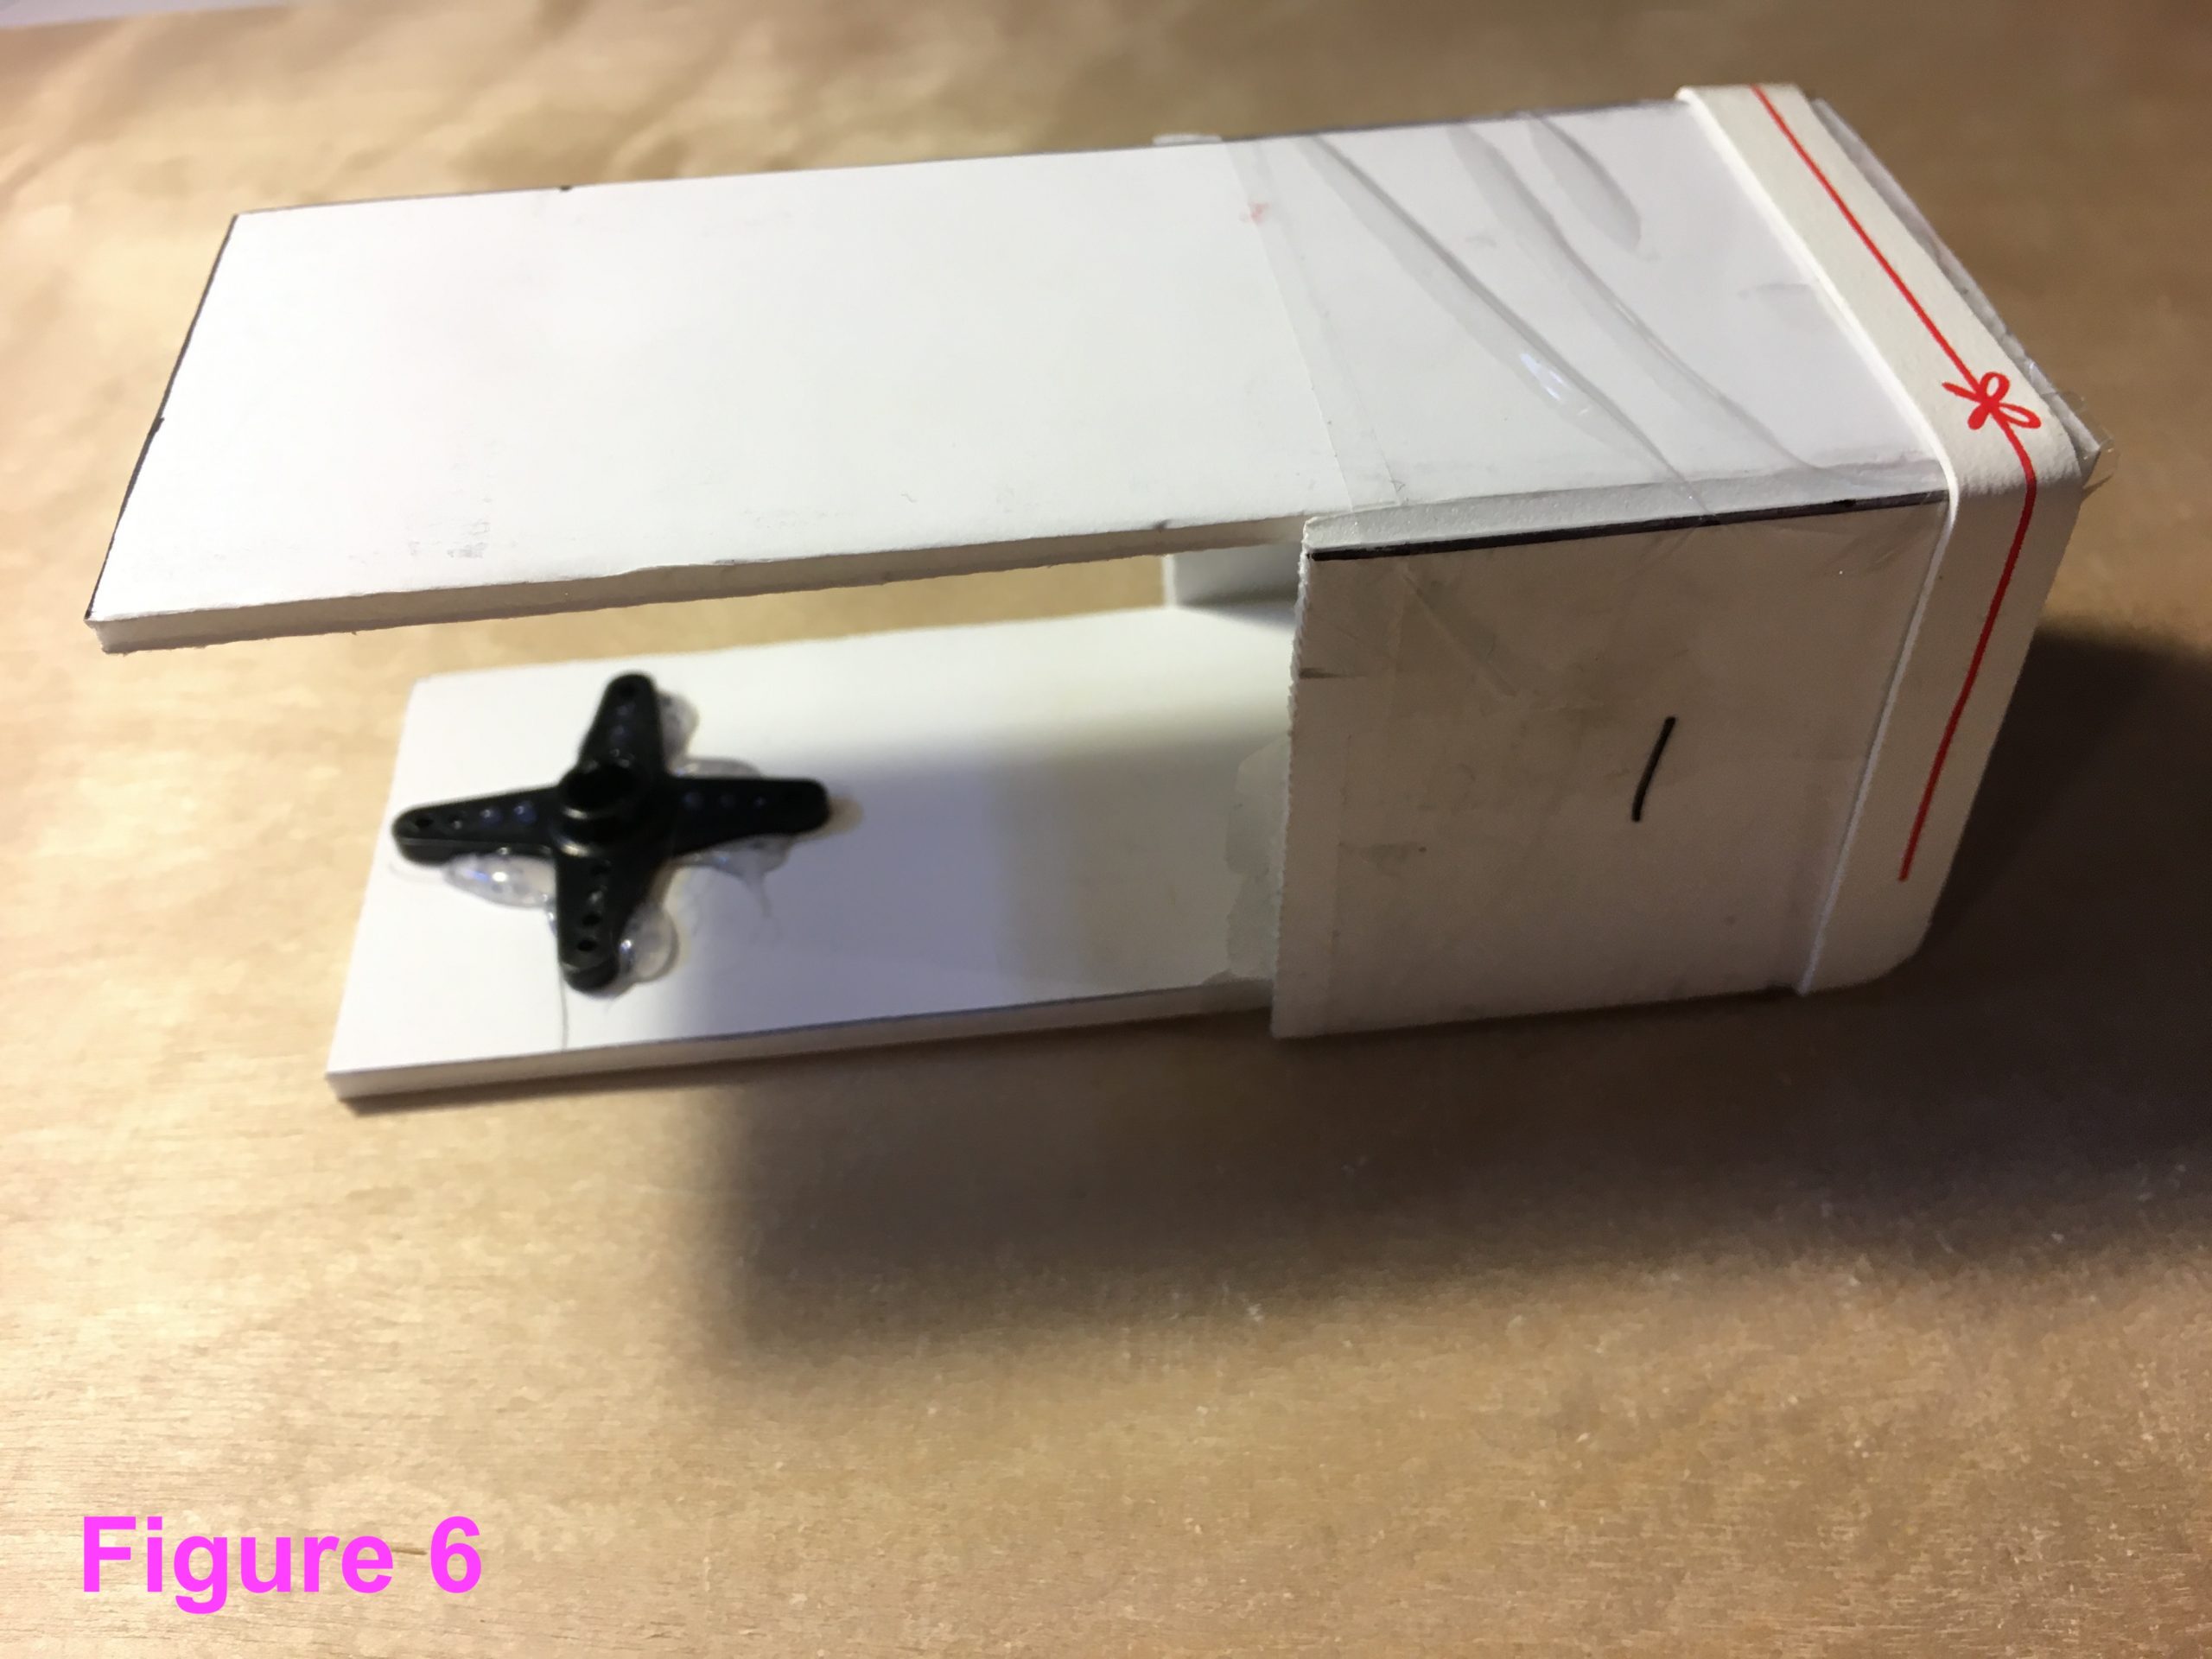
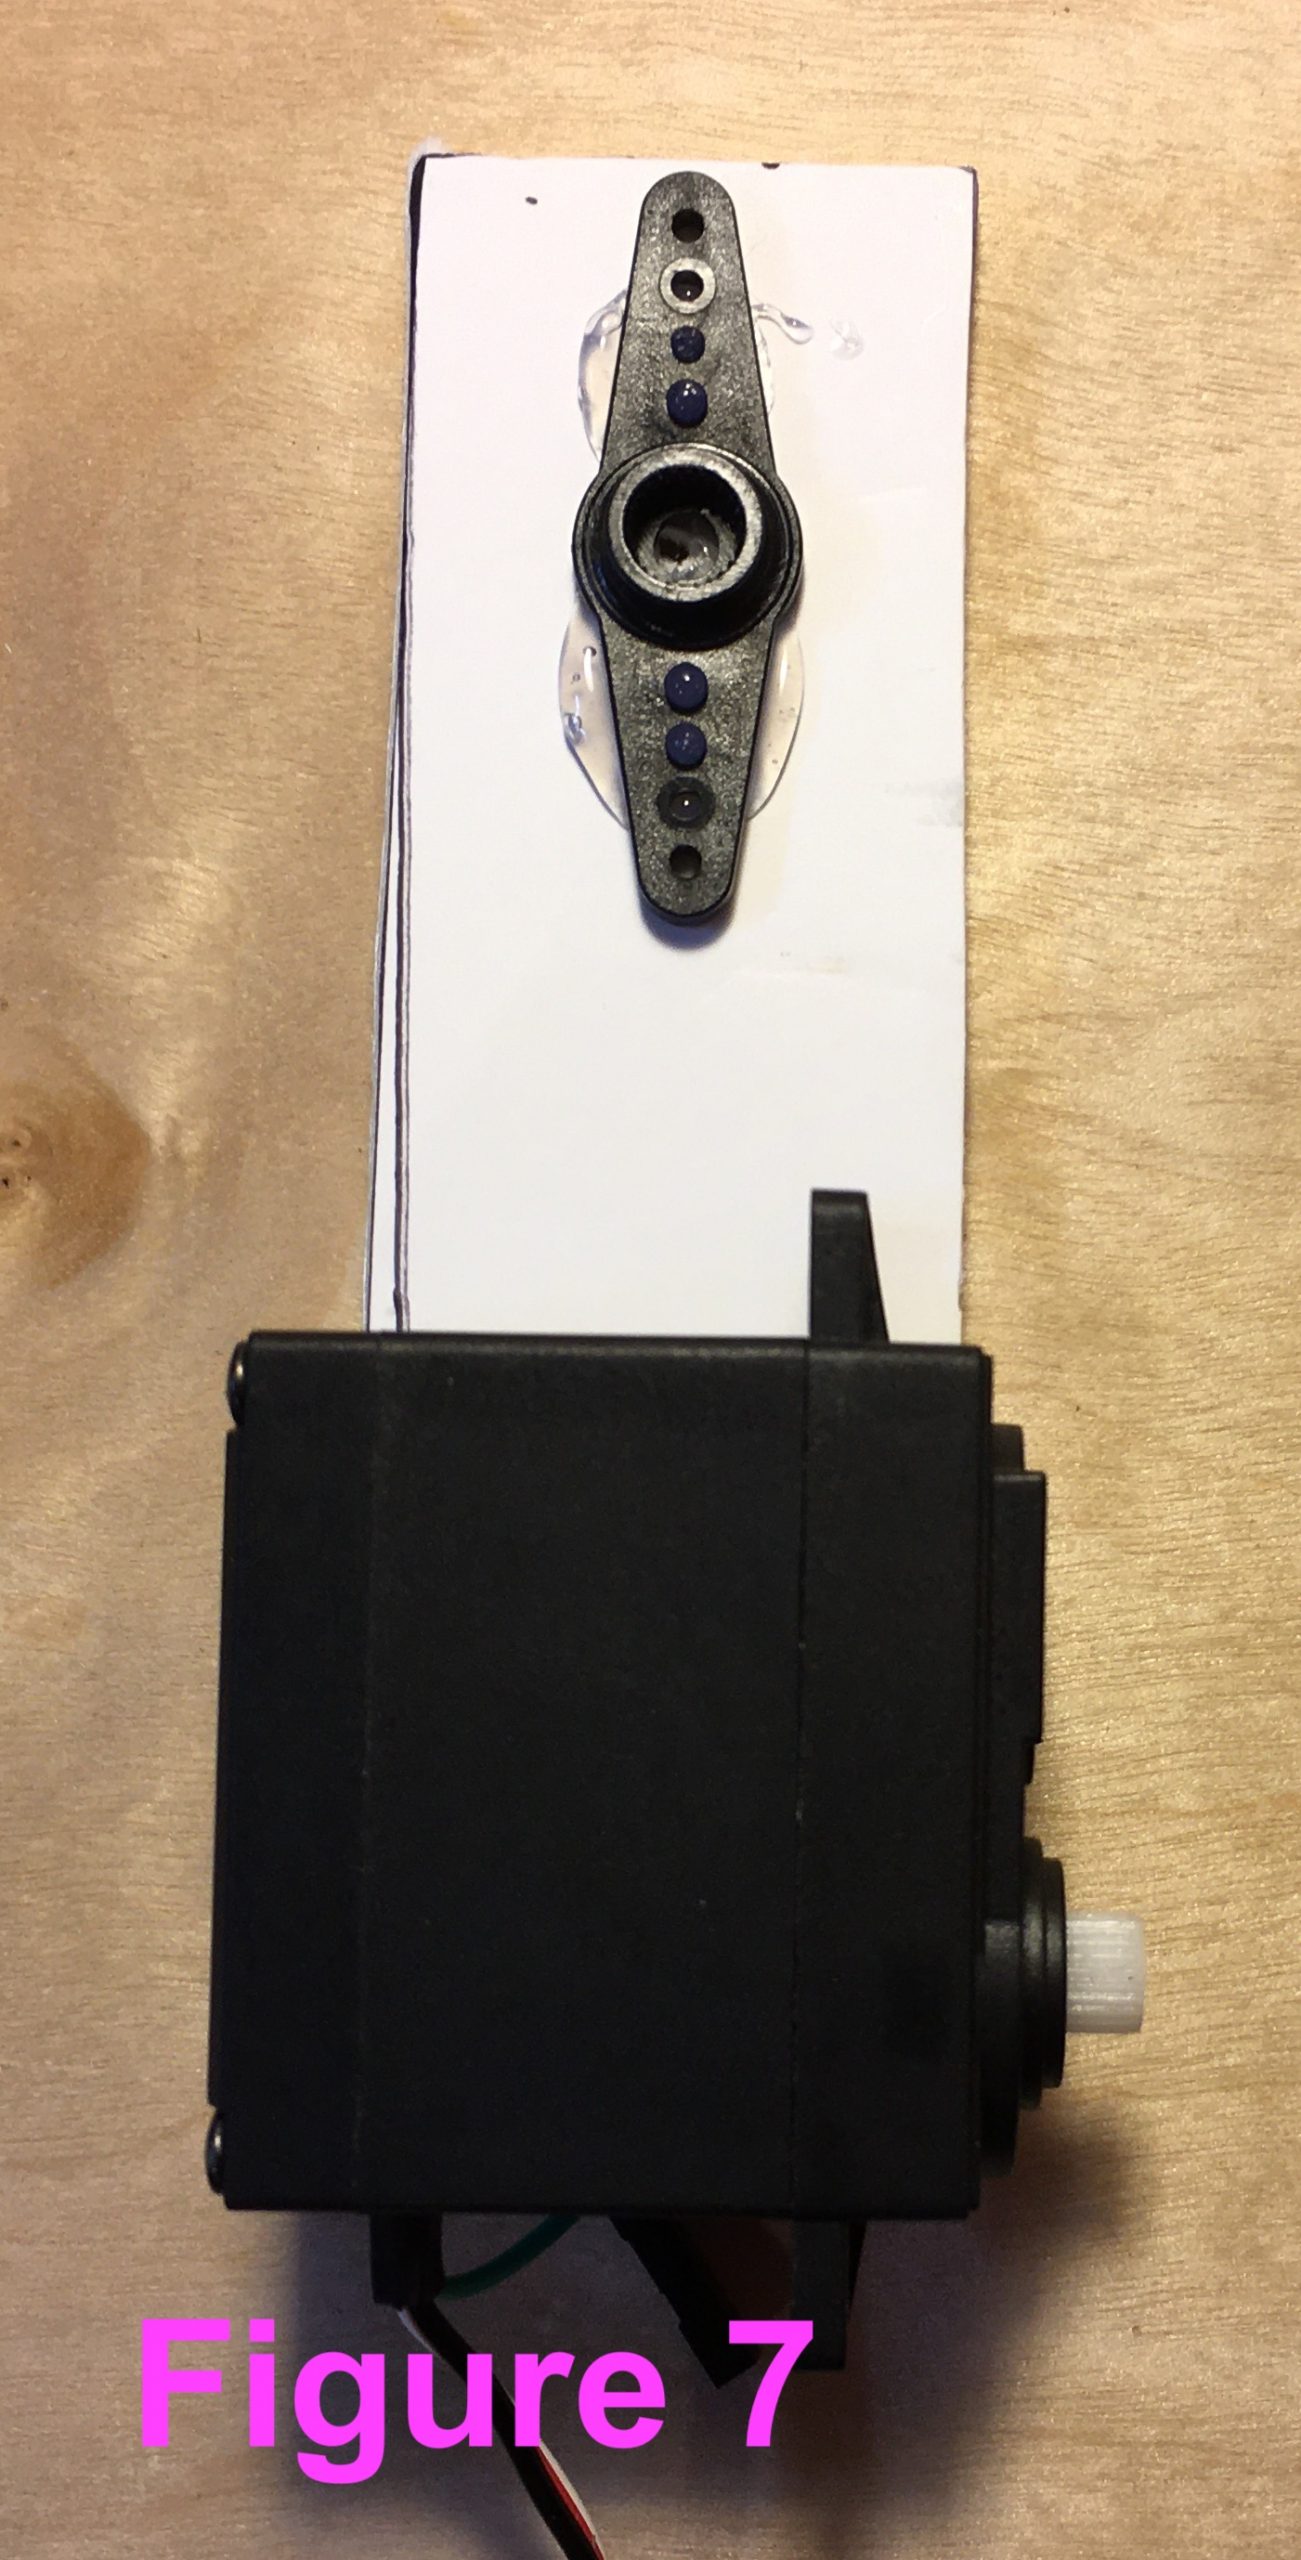
- Now take the 3 servo horns, glue one to the inside of each leg, and one to one end of the tiller(see Figure 6 for positioning of leg horns, and Figure 7 for tiller horn)
- Glue the other end of the tiller to the side of the “mid” servo. Make sure the servo’s shaft is pointing to the right when you glue it. (see Figure 7.)
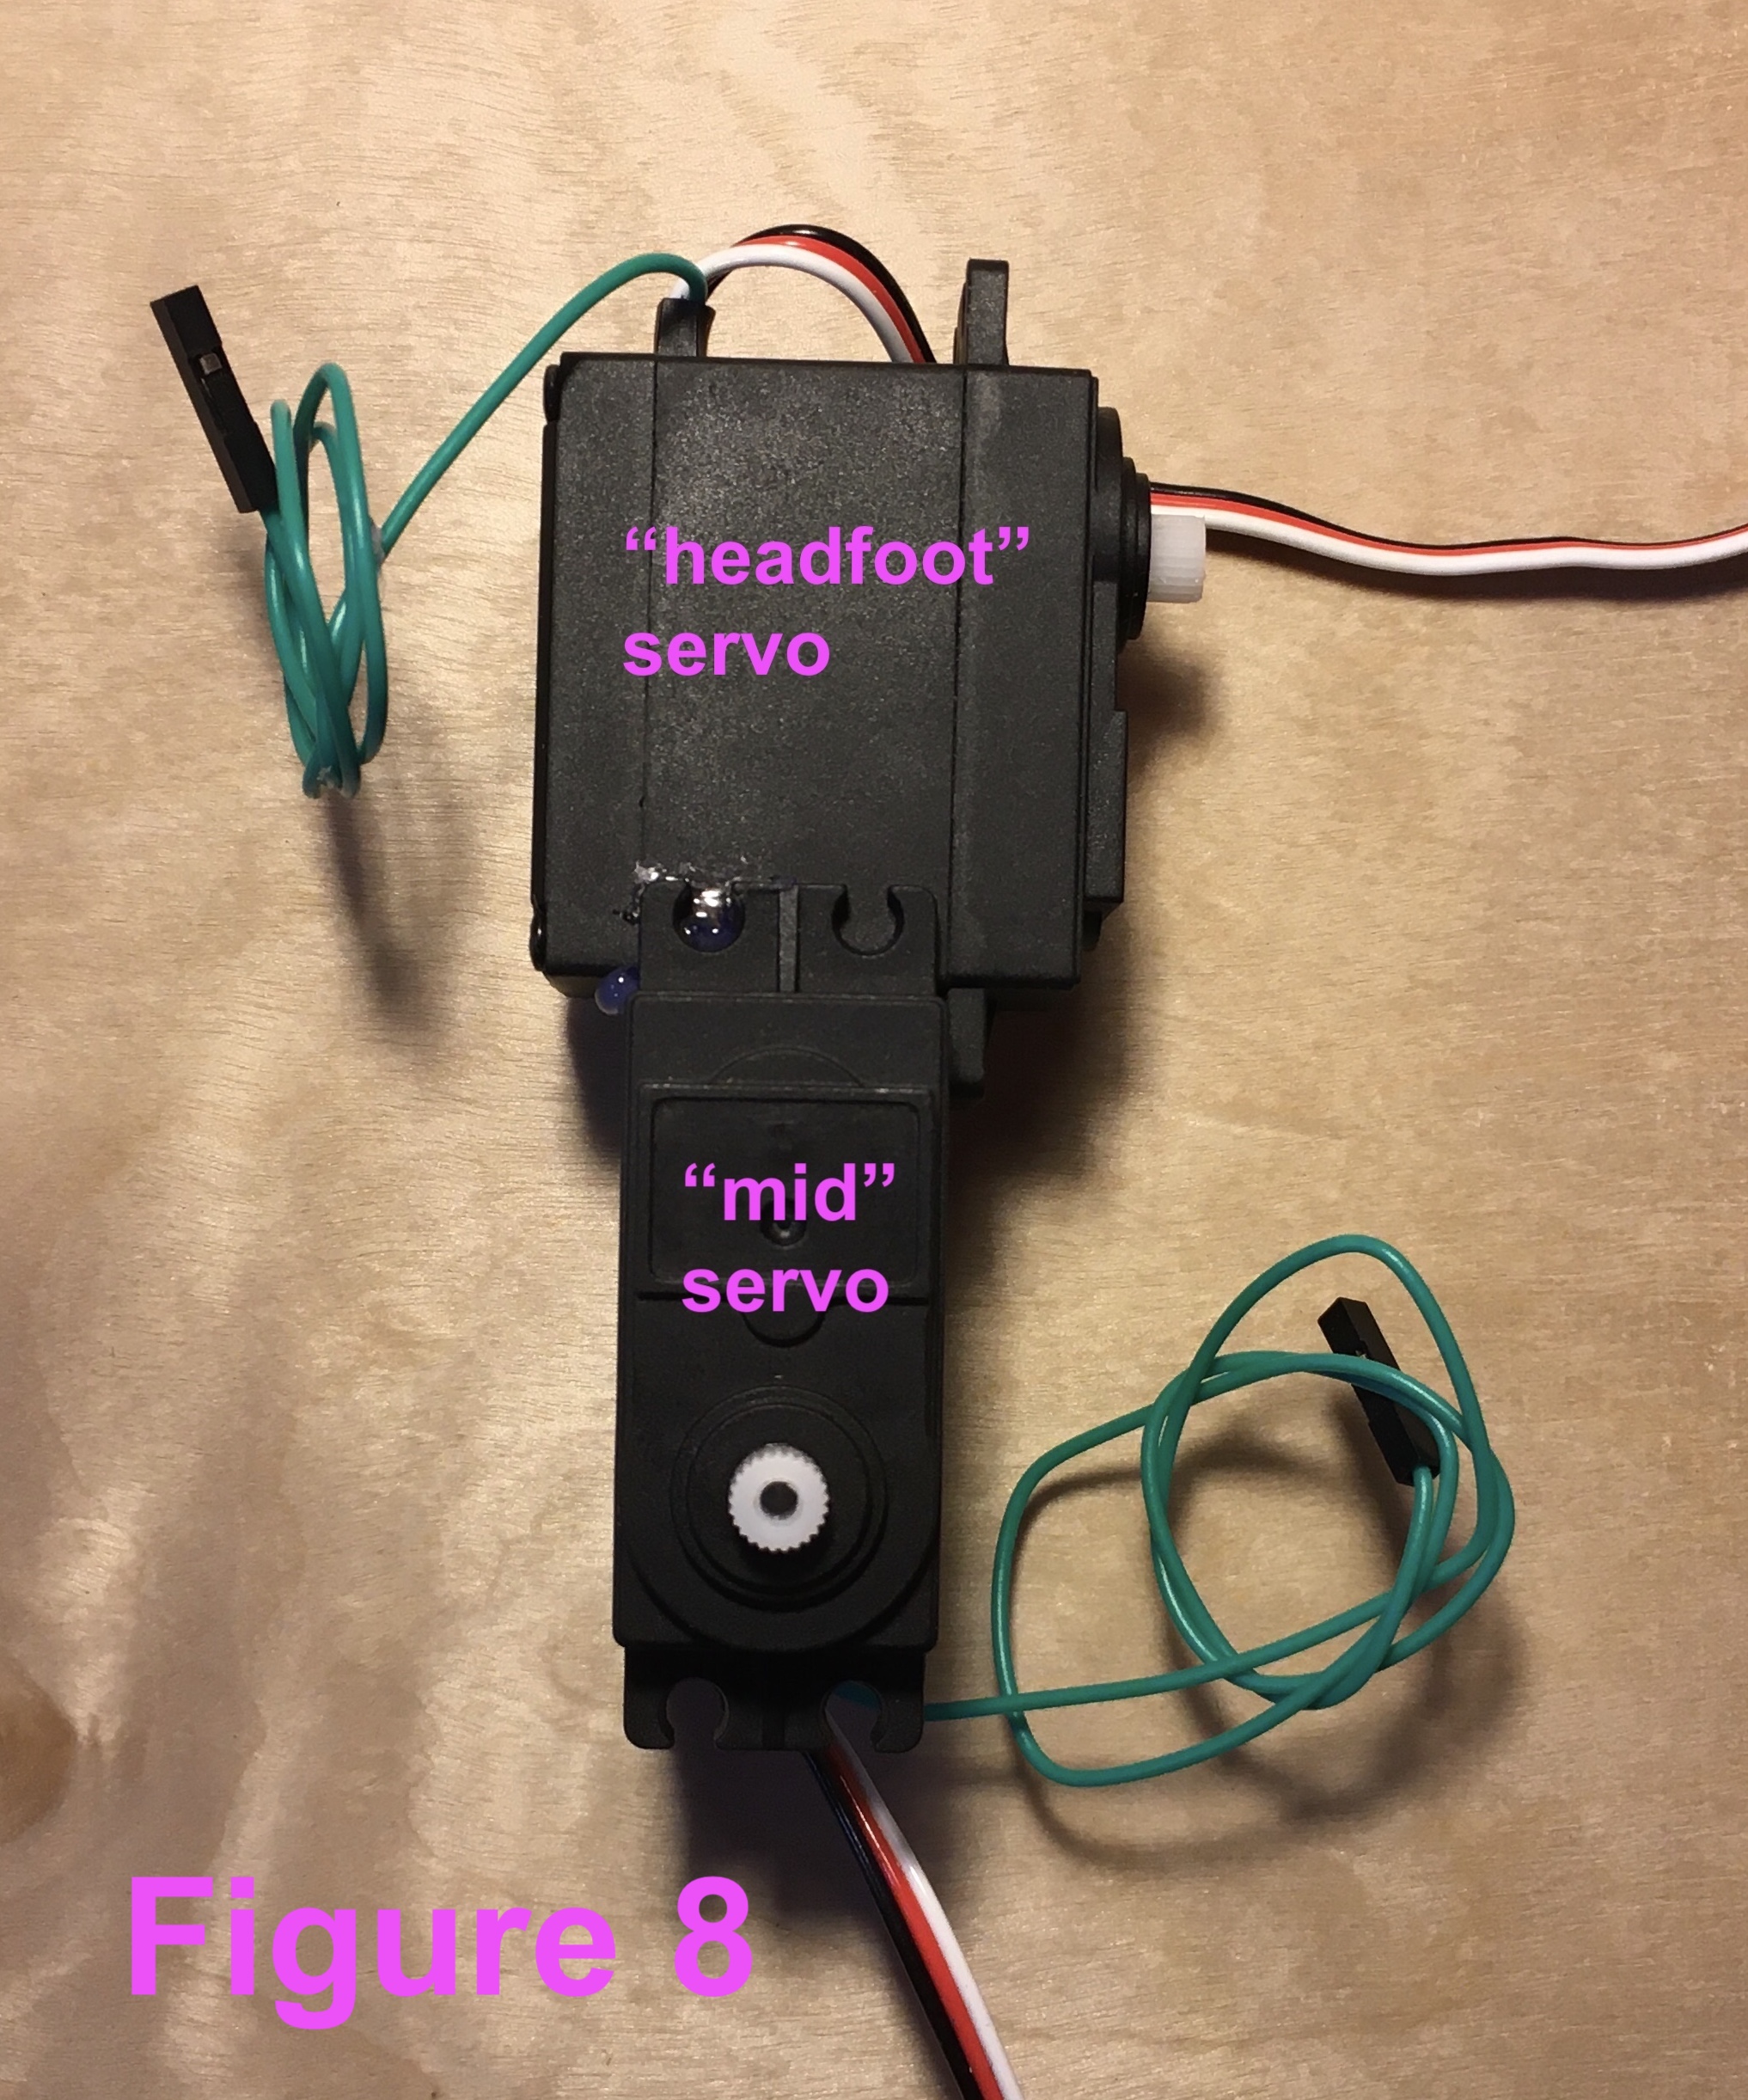
- Finally, you are going to glue the “mid” and “headfoot” servos together at a 90º angle such that the “mid” servo’s output shaft points up and the “tailfoot” output shaft points right. (See Figure 8)
Zero the Servos
Before moving into the final assembly, let’s take a second to “zero” your servos (i.e., make sure the shafts are currently at their “neutral” position). Your computer should be turned on and booted into Xubuntu, and the Pololu Micro Maestro 6-Channel USB Servo Controller (heceforth the “Controller”) should be powered up from it’s AA batteries and plugged into the computer.
If all that’s the case, then:
- Launch the Maestro Control Center (MCC) software like so:
- Open Terminal Emulator
- Navigate to the Maestro folder (probably by running cd ~/Desktop/maestro-linux) and type ./MaestroControlCenter and hit Enter to launch the MCC
- Go to the “Serial Settings” tab of the MCC and select “USB Dual Port”
- Go back to “Status” tab and tick the “Enabled” boxes next to the first three Servo channels listed (i.e., #0, #1, #2)
- Use the sliders to set servo position to the center of each range. (The value in the “Target” box should be “1500.”
That’s it. You can now exit the MCC and finish assembly.
Assemble the Inchworm
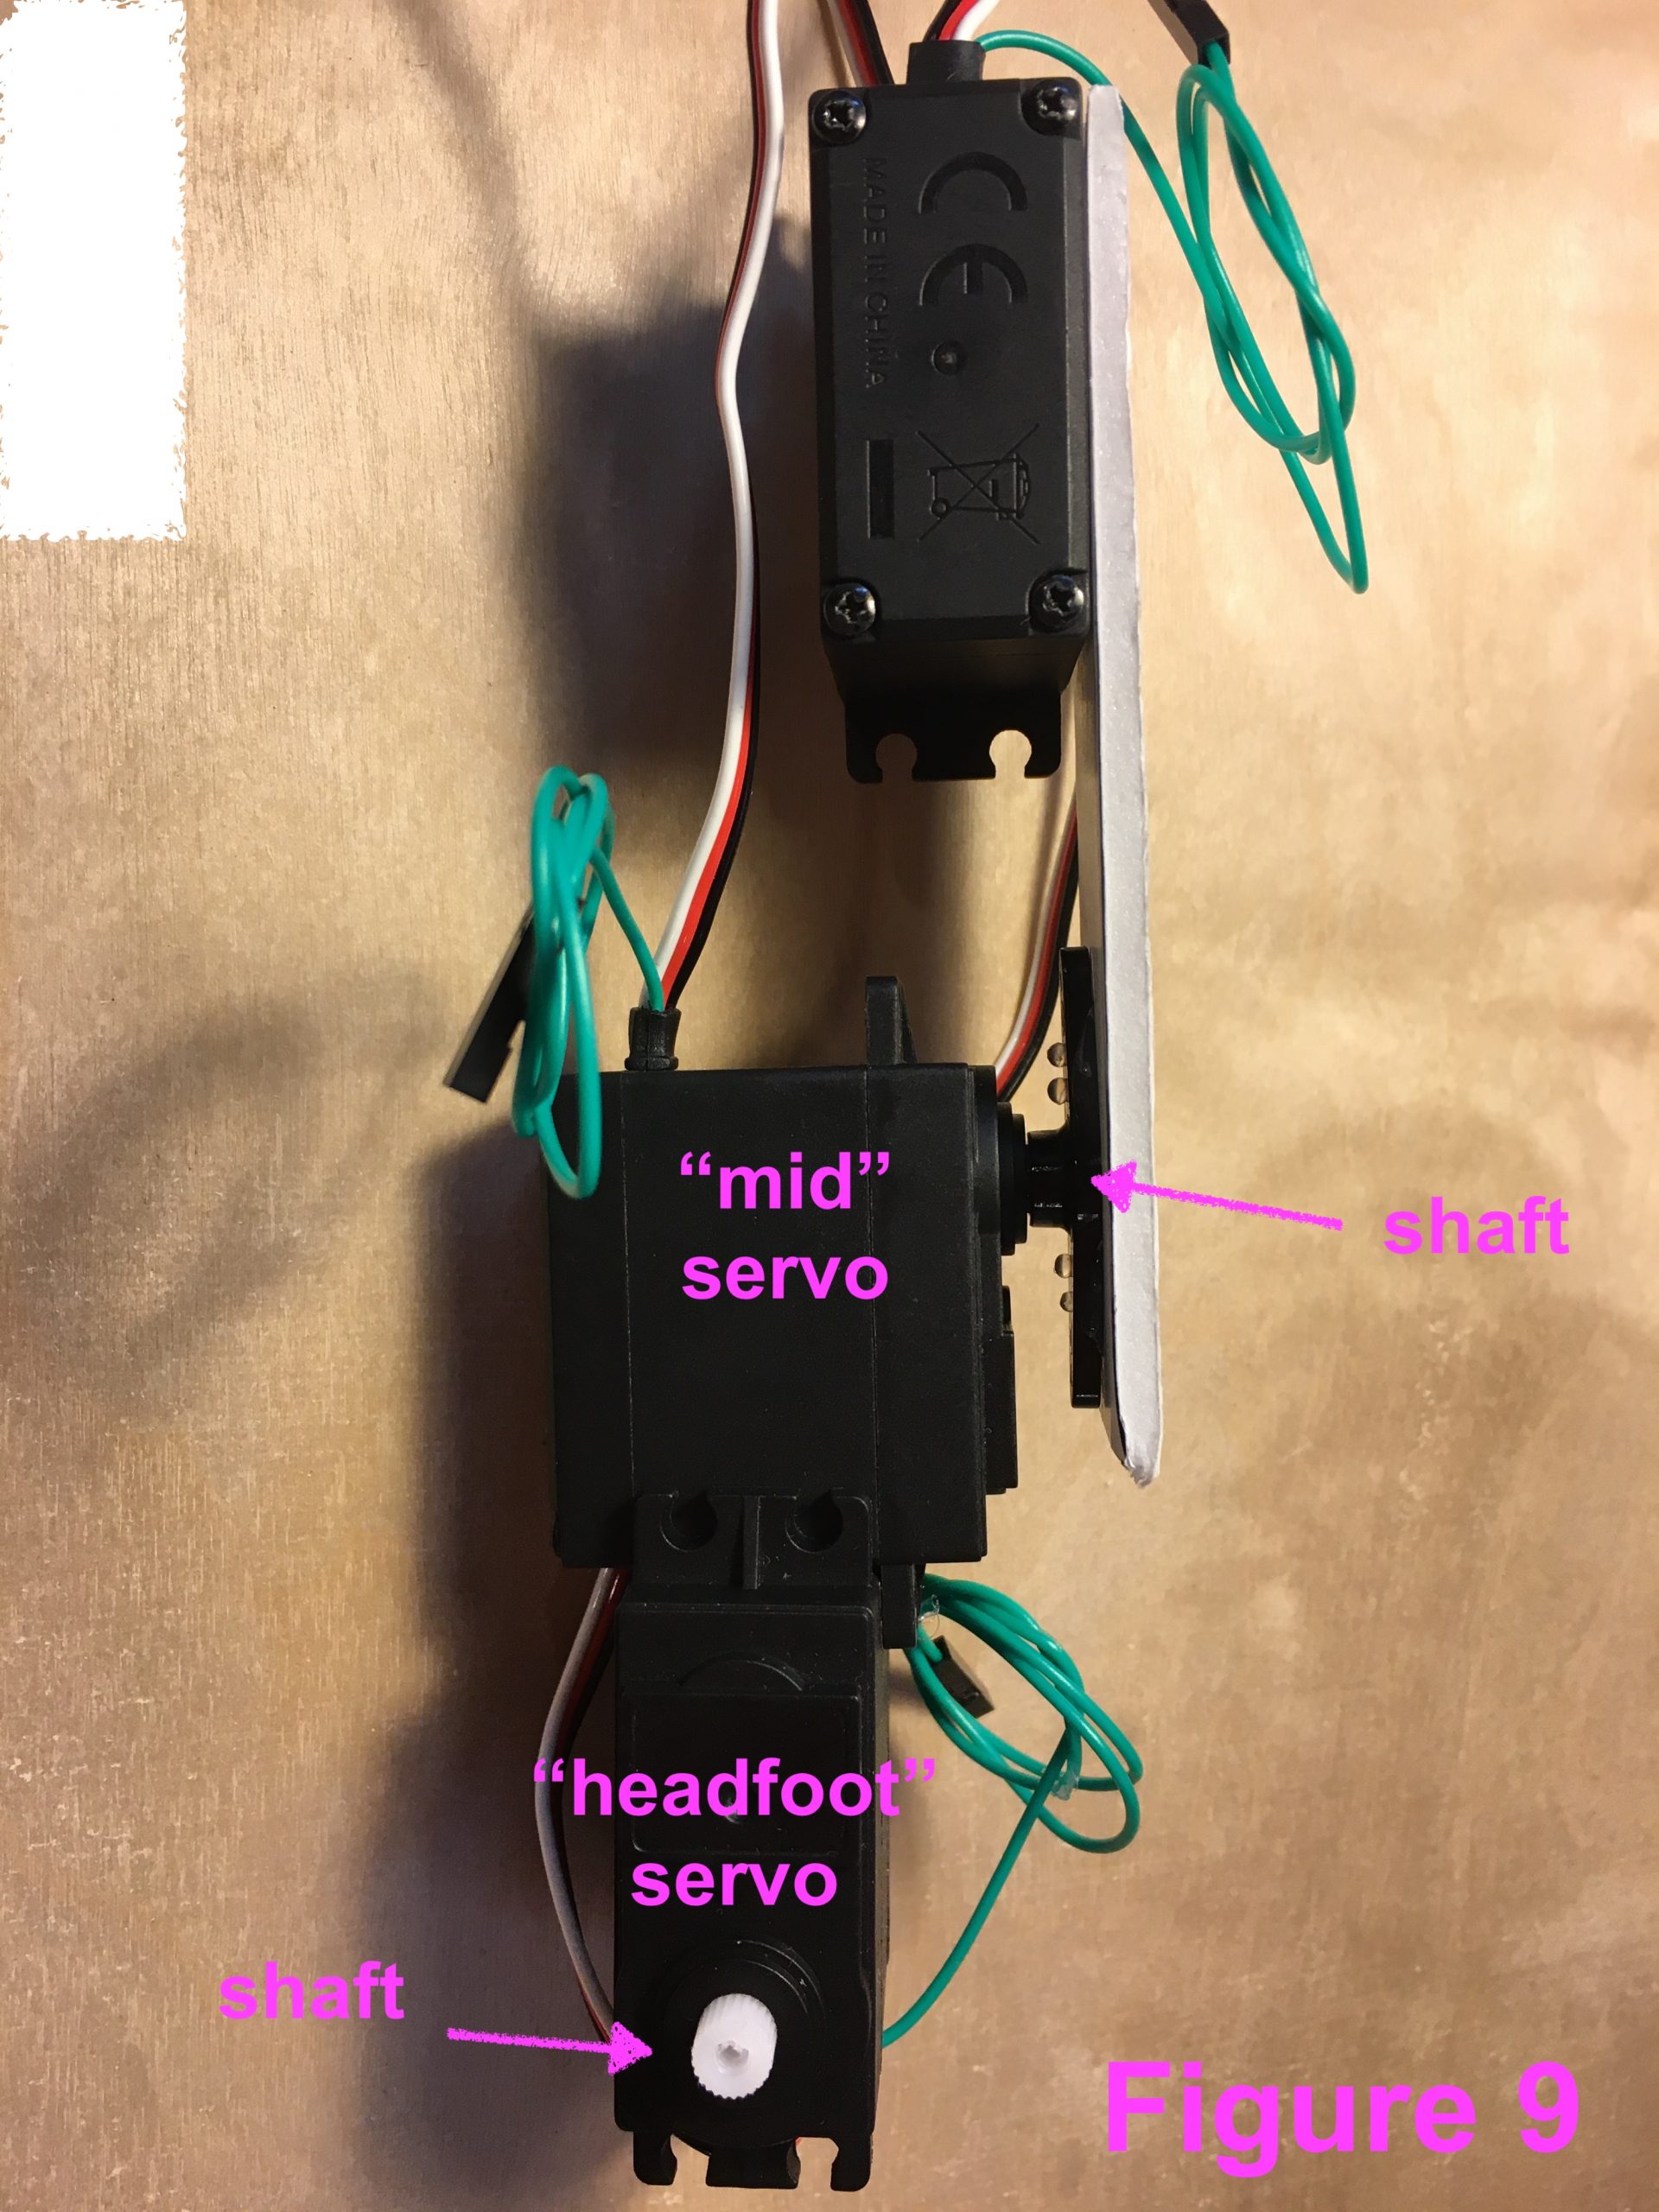
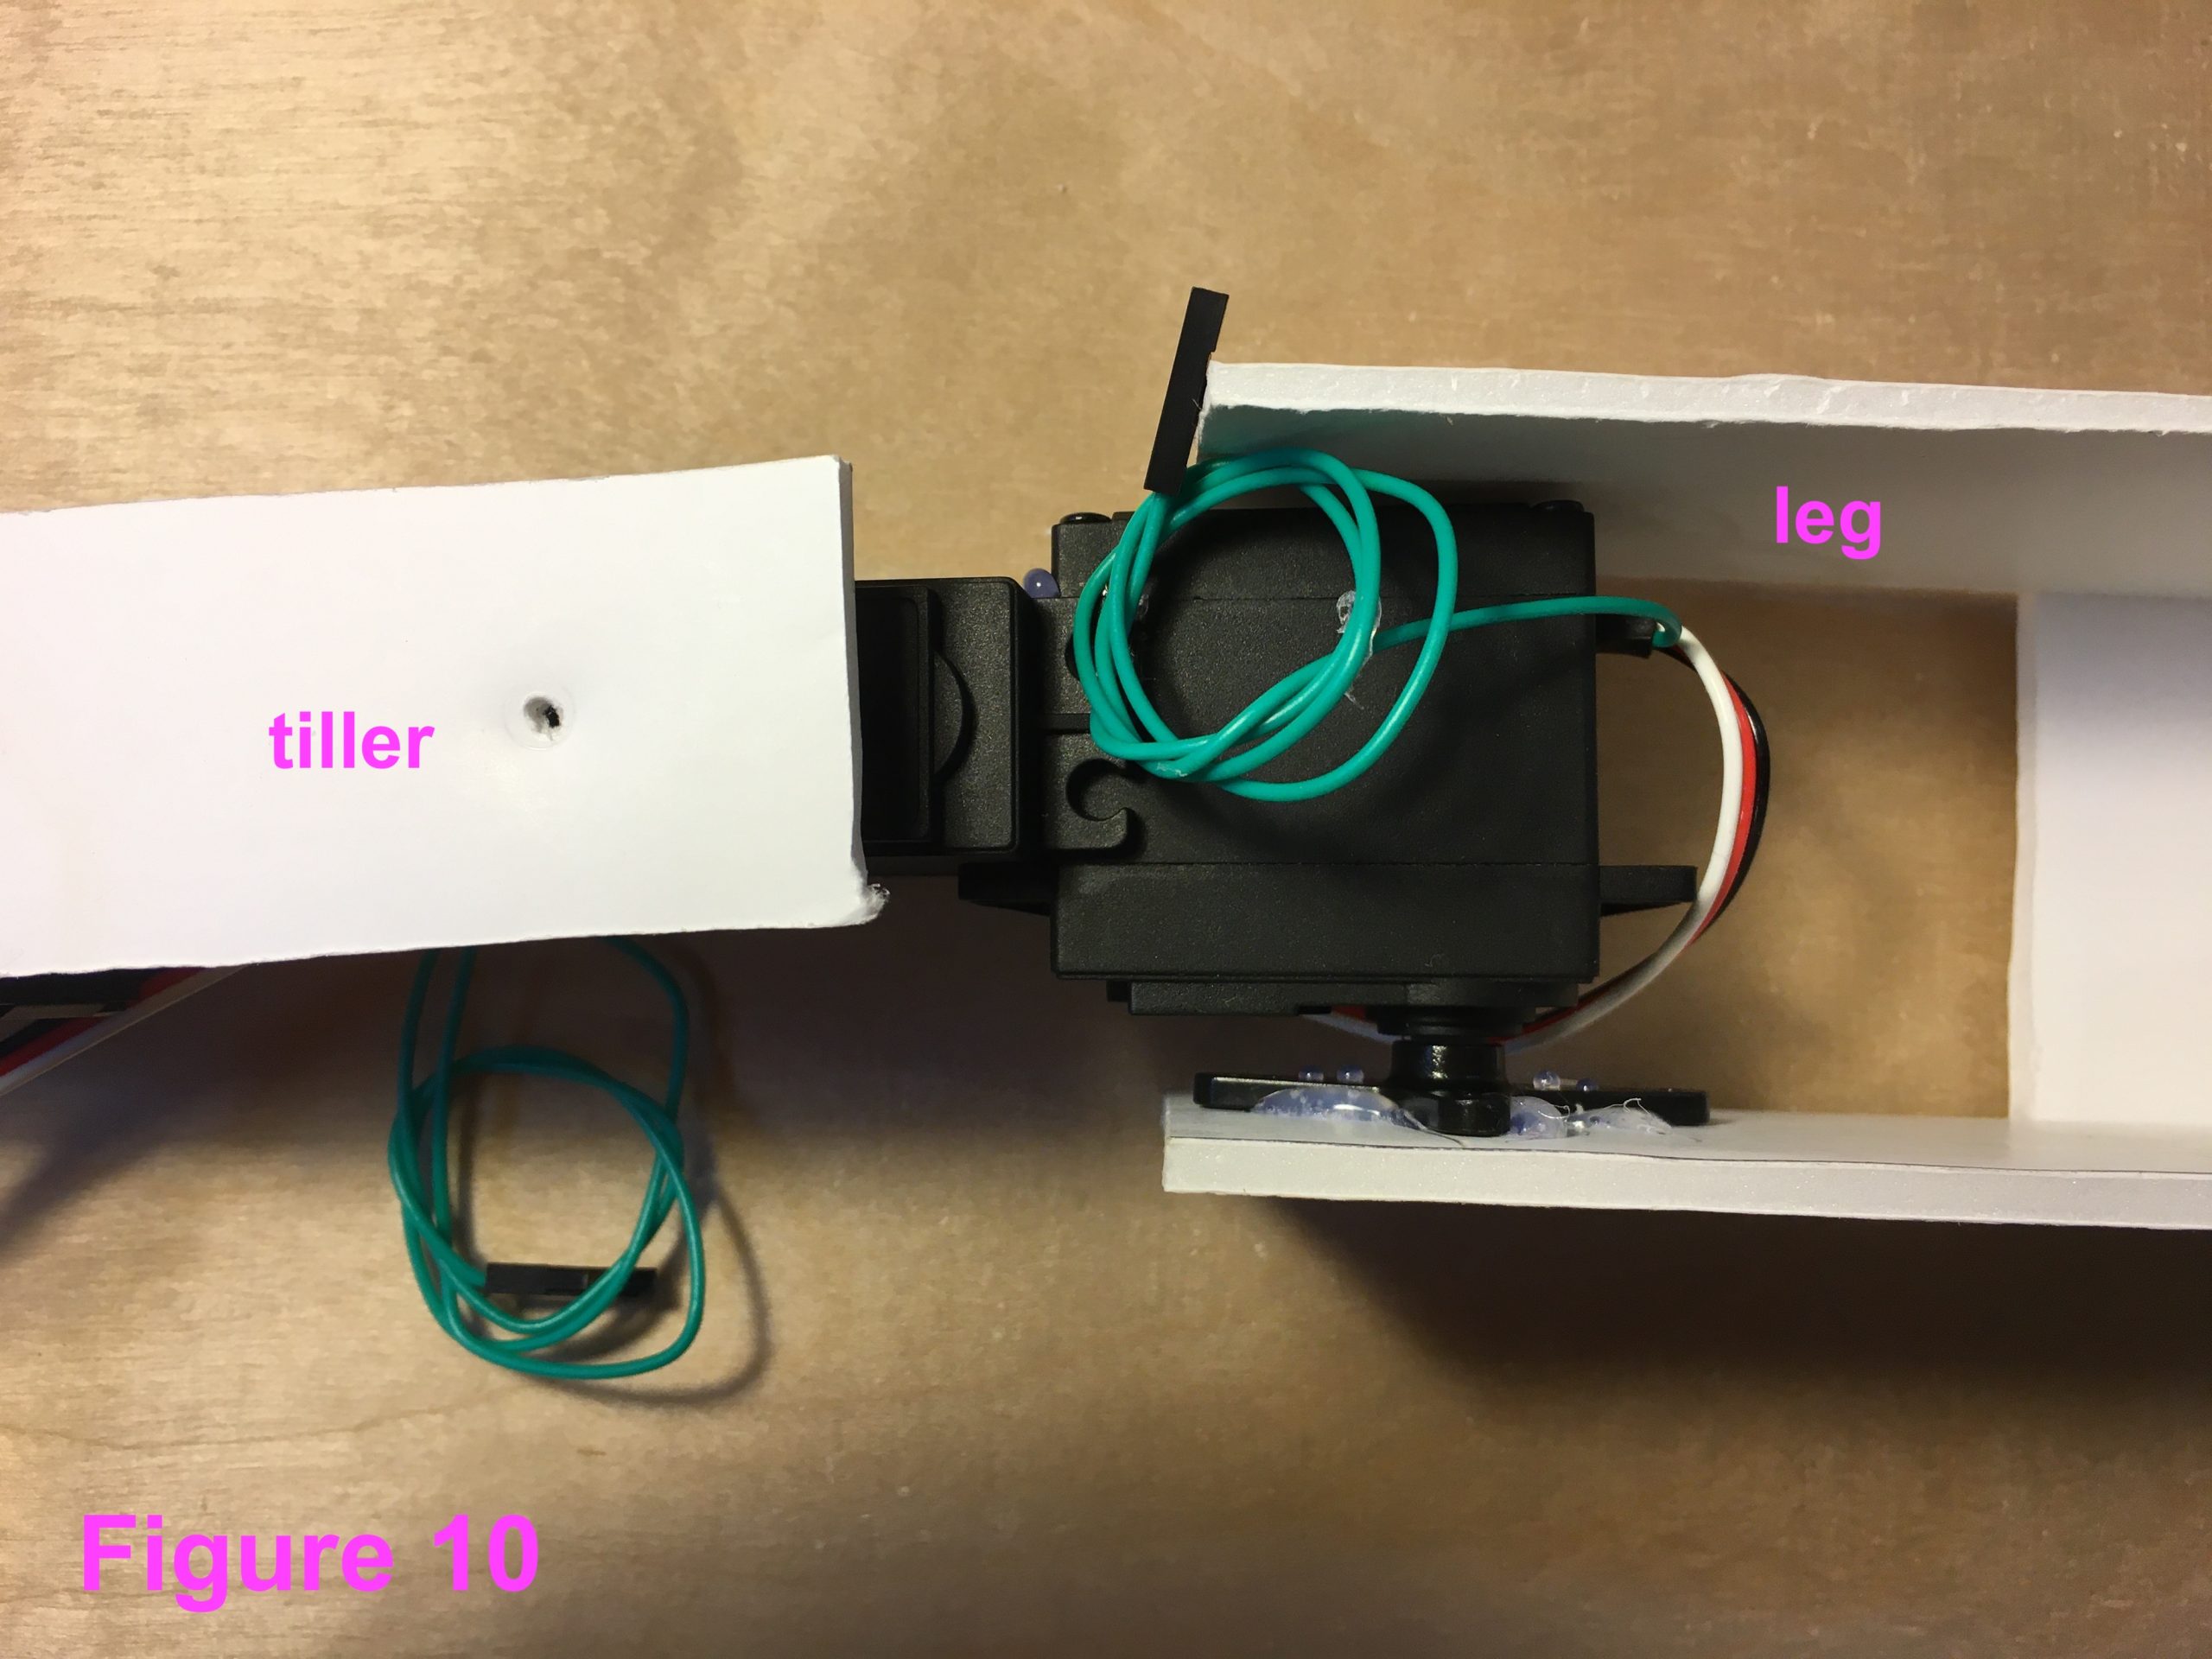
- Start by securing each servo to its horn. Place the mid/headfoot servo assembly on your workbench so that the mid’s shaft points toward the ceiling and the headfoot’s shaft points right (see Figure 9). Slide the tiller’s horn onto the shaft of the mid servo. Then attach each leg. (Figure 10)
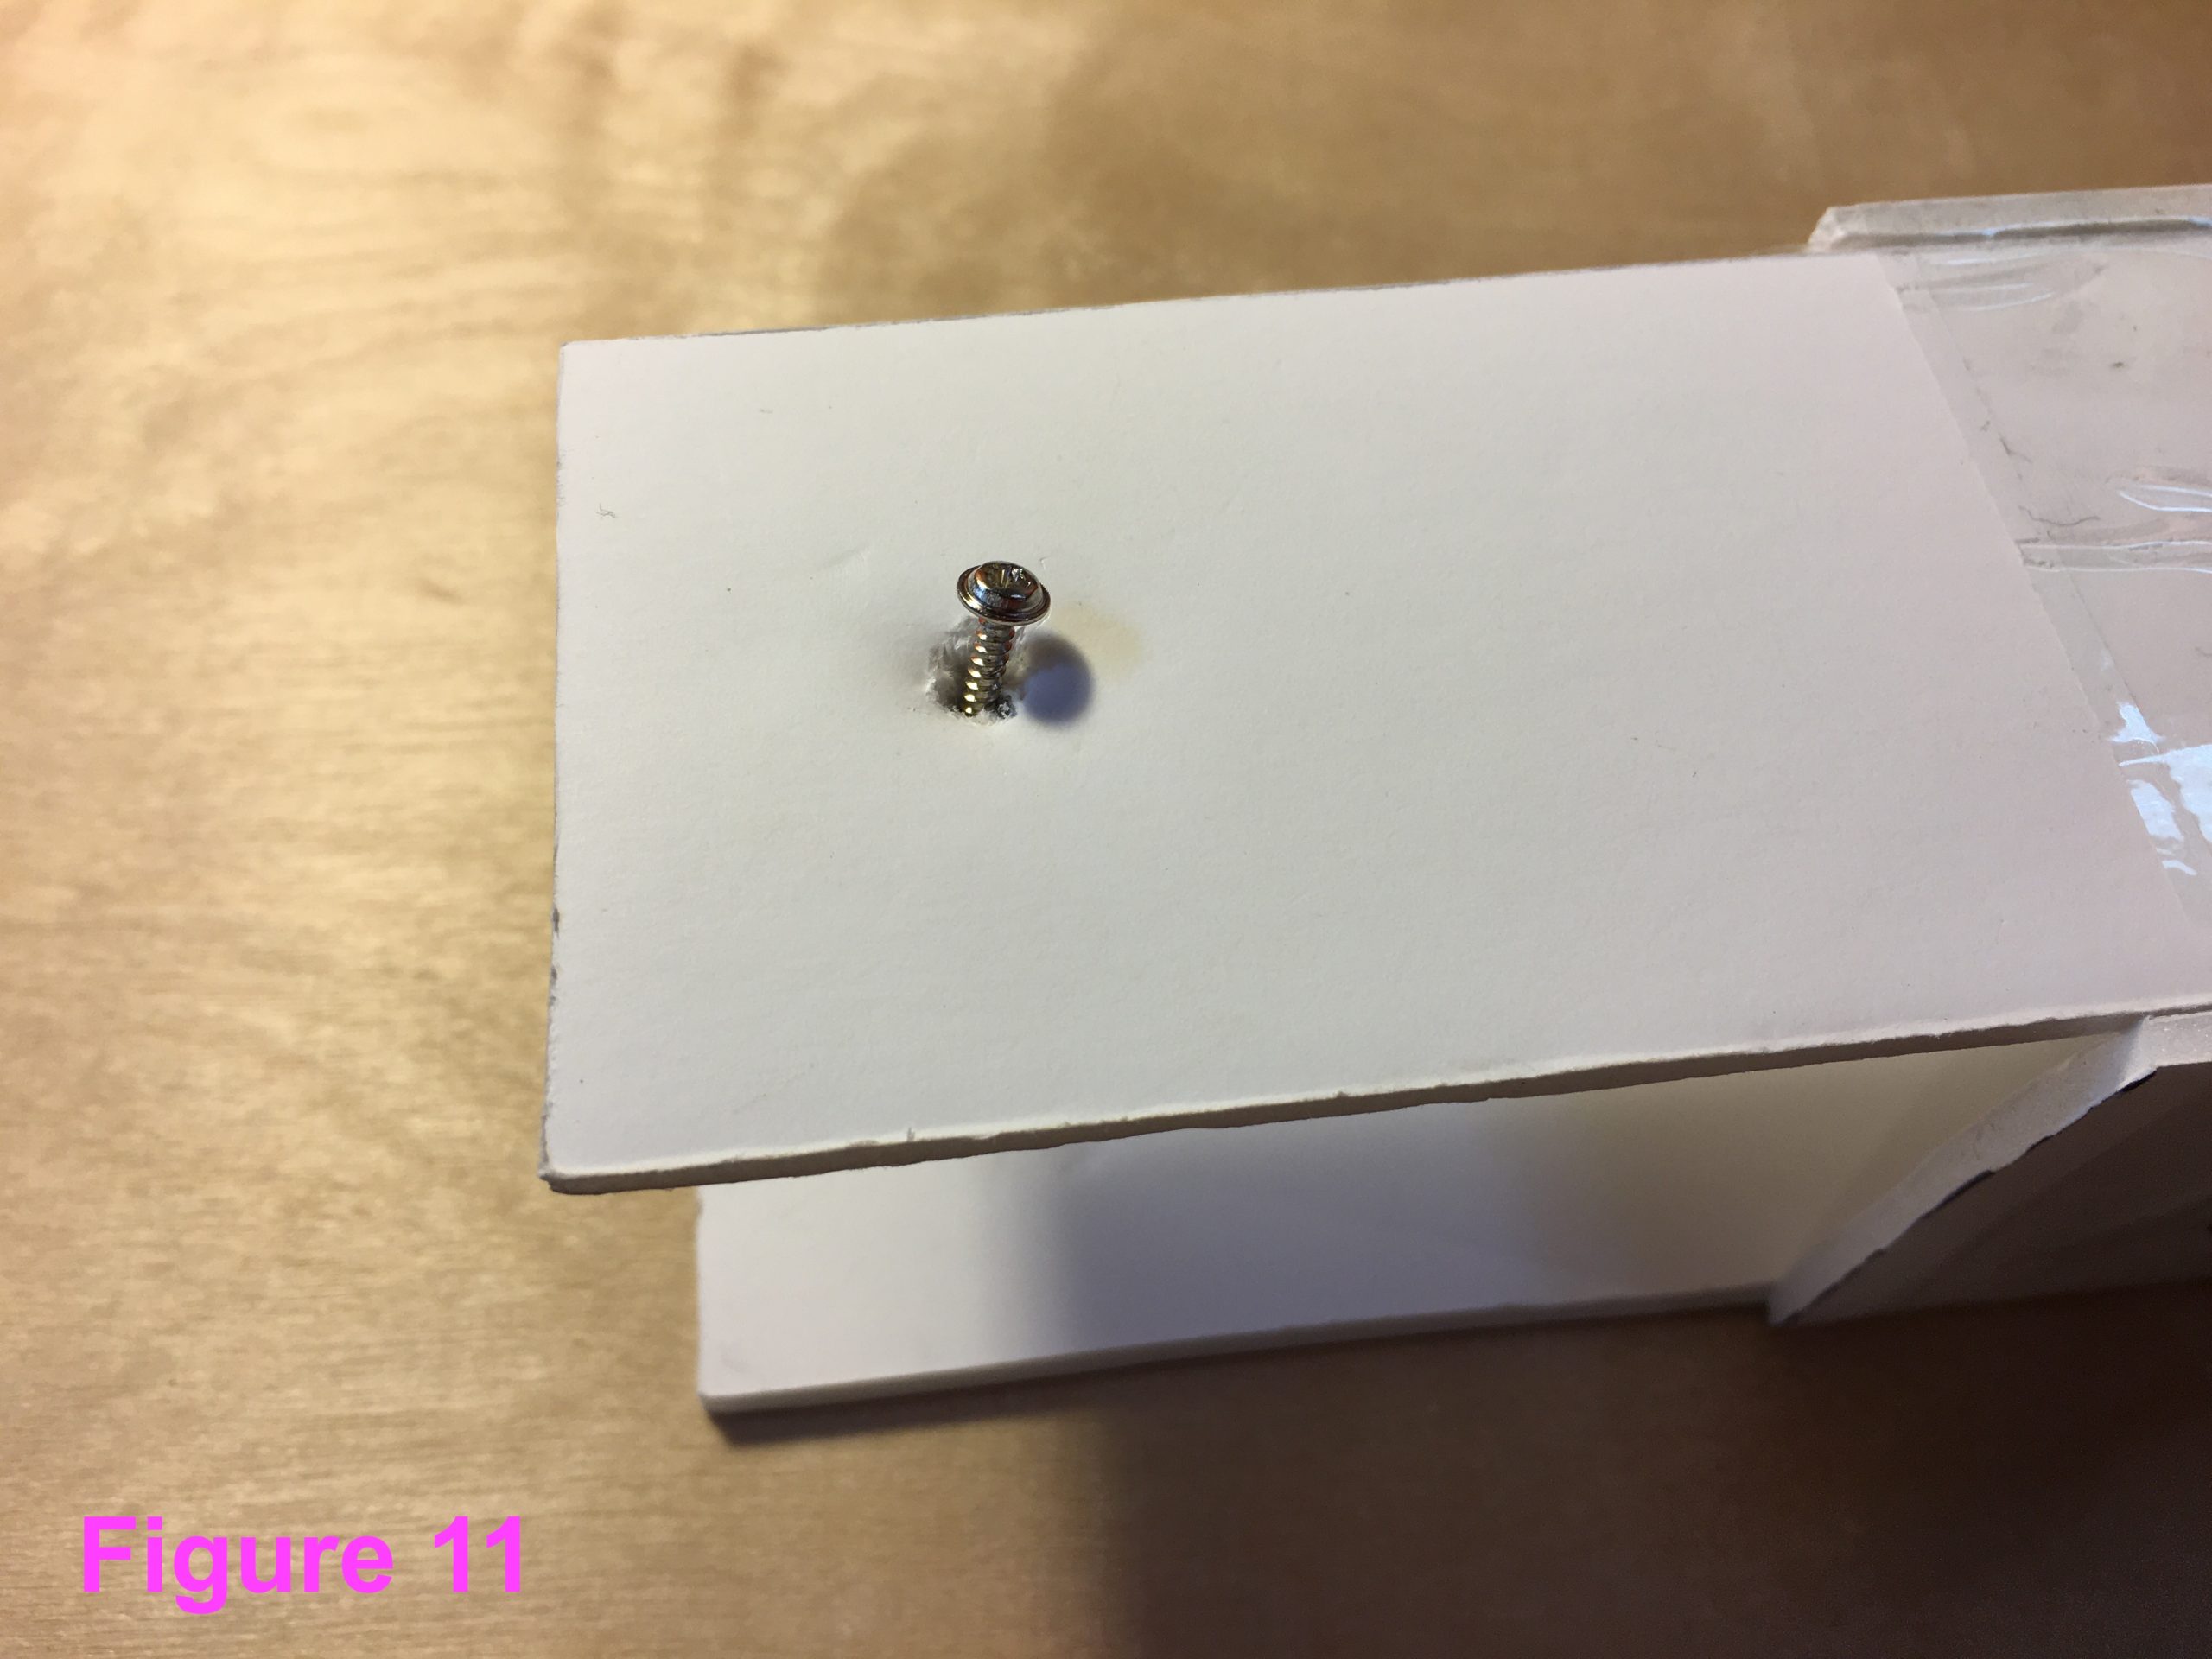
- Using the tip of your hobby knife carve the foamcore away from the hub of each servo horn. Then use one long screw to secure each leg/tiller to its servo (see detail in Figure 11)
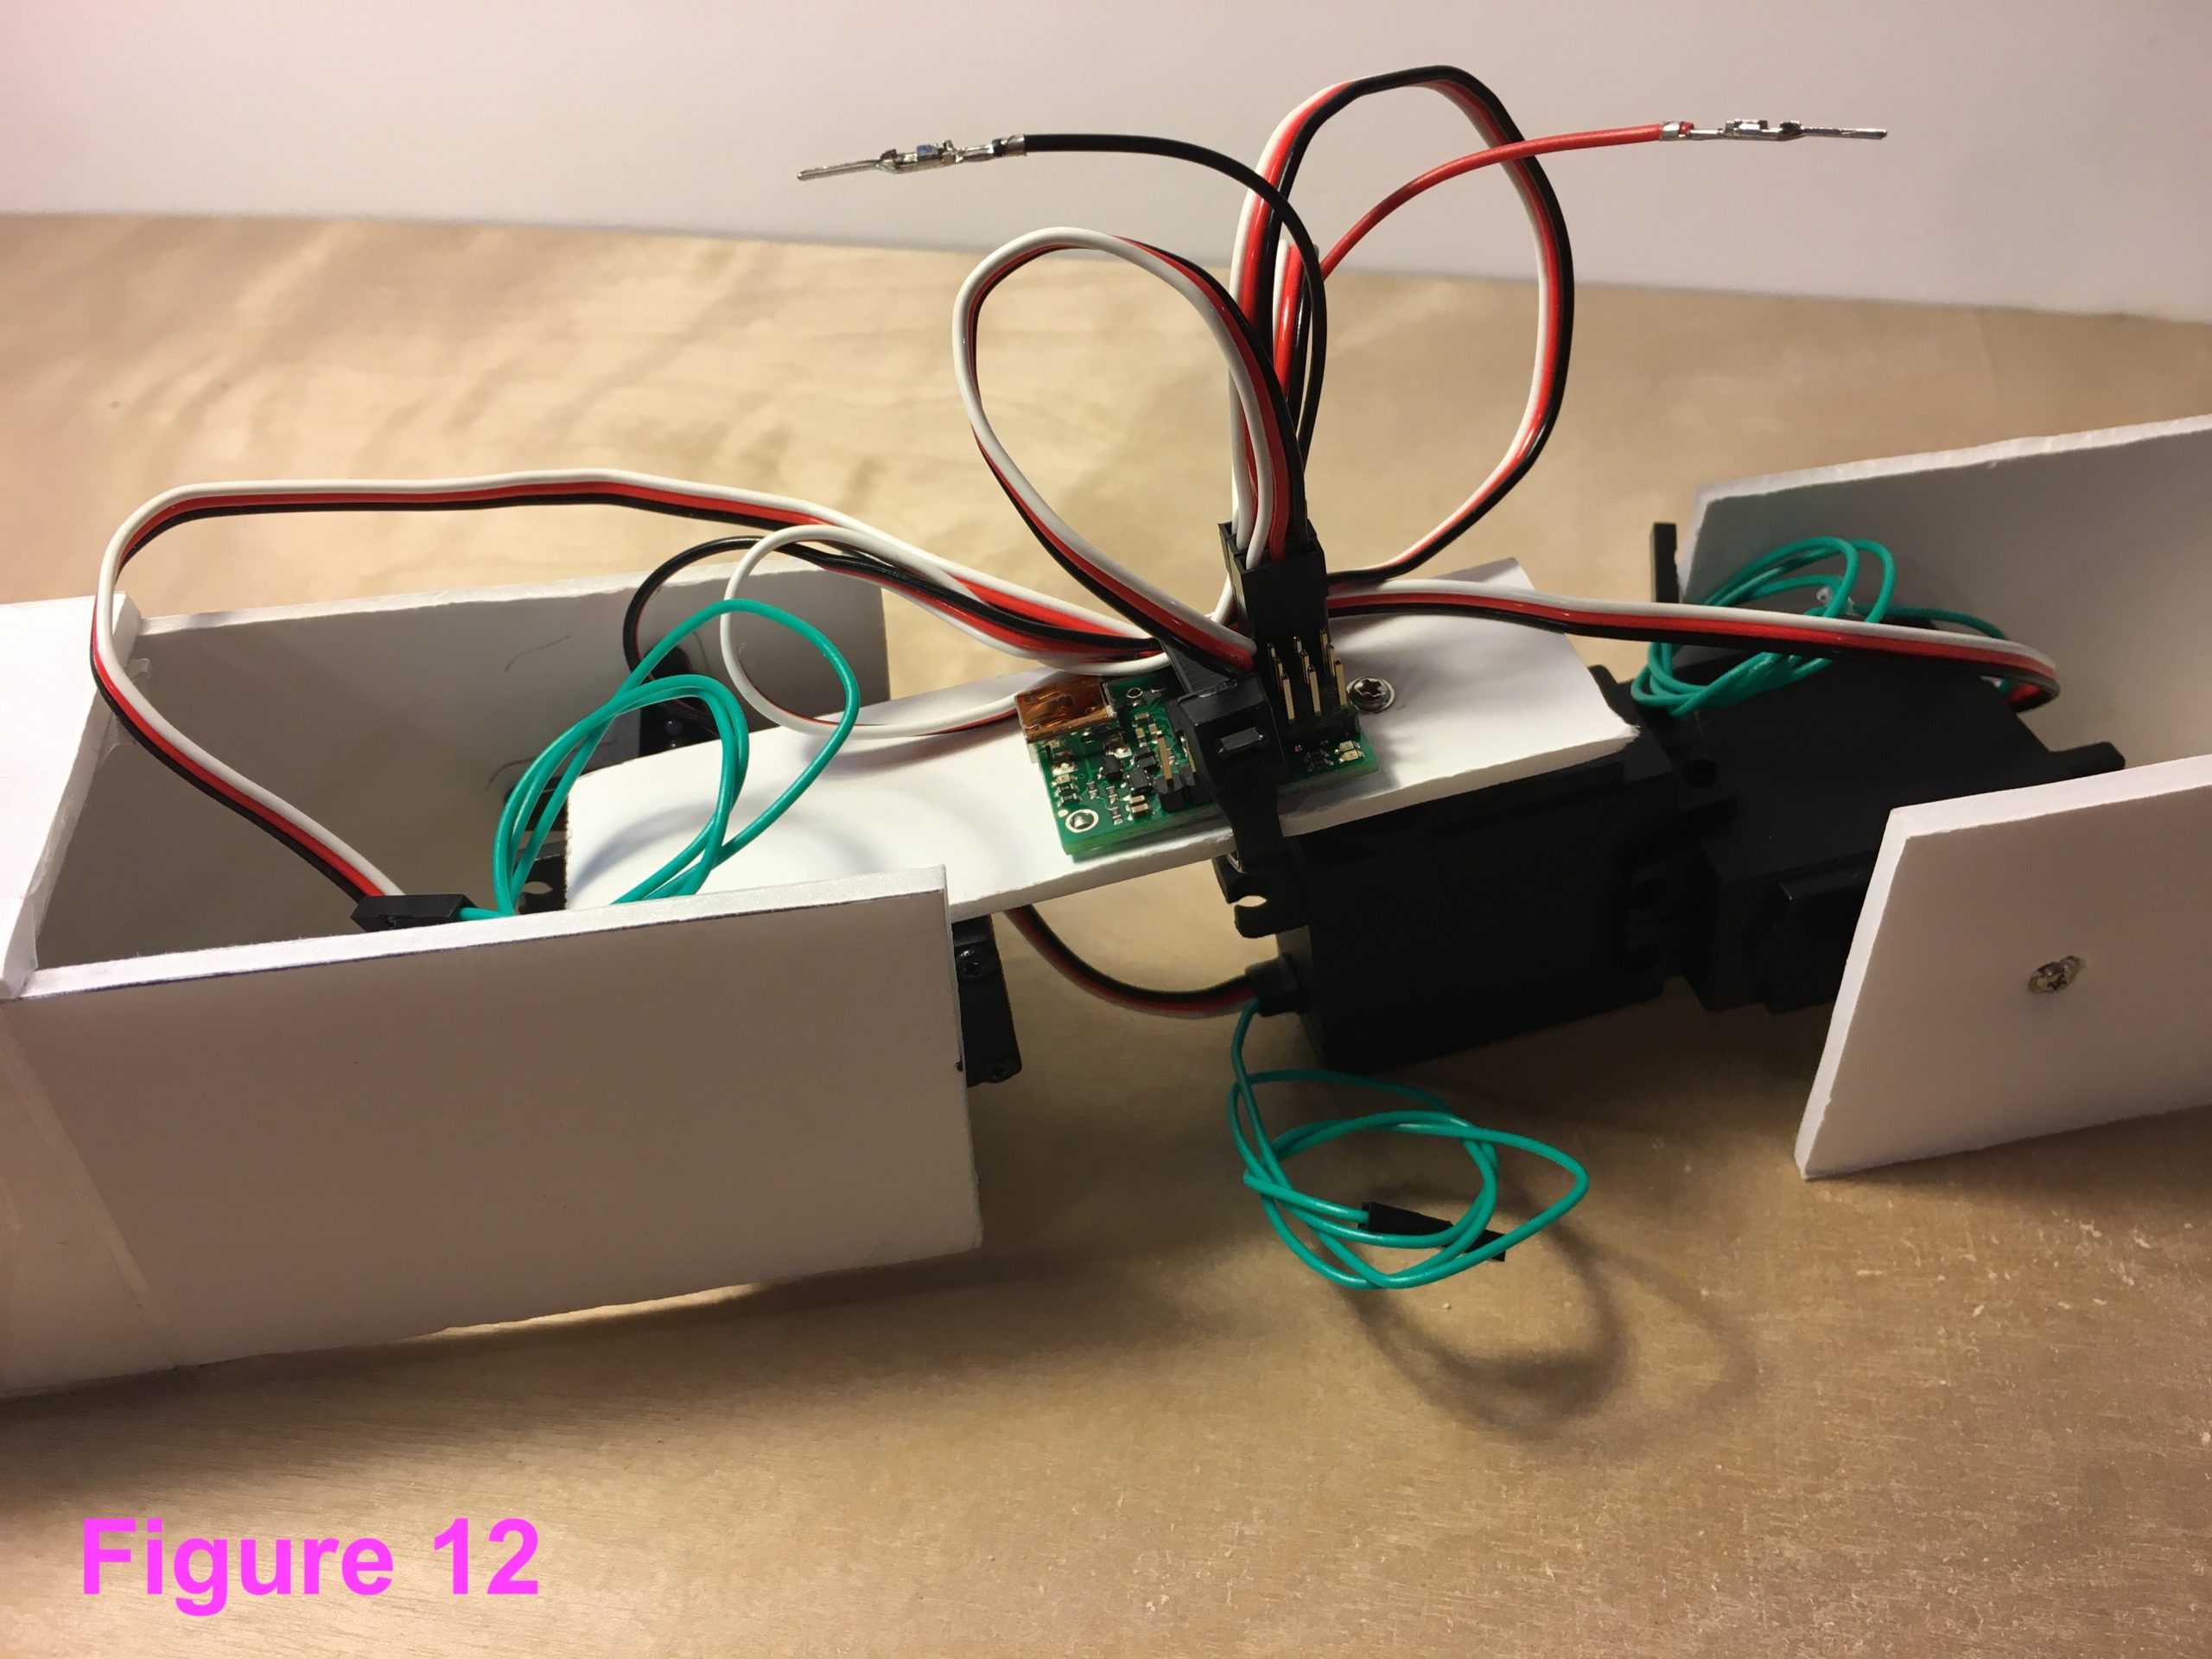
- Finally, use a little double-sided tape or a zip-tie to secure the Controller to the tiller. The results are shown in Figure 12.
- The body is assembled; let’s bring it to life! Plug the Controller’s USB cable back into the computer (if it isn’t already), fire up the MCC software (as described in the previous section), and use the sliders to control the servos. Make all the servos wiggle and thrash a bit, and see if anything falls off (it can be hard to get those servo horn screws to catch in the drive shafts).
Making the Inchworm Inch
While you can use the sliders in the MCC software to get your Inchworm inching around, doing so is extremely tedious. Instead, we’re going to quickly throw together a script based on dynamic.py
- Using your text editor of choice (such as Mousepad—included with Xubuntu—or the command line utility pico) create the script shown below (you can just copy and paste it into your text file). Save it on the Desktop as inchworm.py:
- Using the Terminal navigate to the Desktop, and run your script by entering “python3 inchworm.py” (The Terminal may reply with a string of WARNINGs you can ignore.) A fresh blank “pygame” window will pop open. (Tons of stuff will start scrolling madly across the open Terminal windows, Matrix-style. That’s fine.)
- Click on the pygame window, so that it’s in the foreground.
- Now you can make your Inchworm inch forward. There are many different ways it might inch:
- On some surfaces, the following works best:
- Hit d and z simultaneously
- Hit s
- Hit x
- … repeat …
- On others, you’ll want to try:
- Hit d
- Hit z
- Hit s
- Hit x
- … repeat …
- And on others, it’s best to lift the tailfoot by hitting z, and then just alternating between d and s to drag your body forward.
- Or you might find some other strategy is better. The inchworm.py code below allows for the following controls
- a lifts the headfoot up
- s returns headfoot to zero
- d pushes headfoot down
- z lifts the tailfoot up
- x returns tailfoot to zero
- c pushes tailfoot down
- Want to turn? Try using i, o, and p
- On some surfaces, the following works best:
- When you’re done, click the pygame window and hit Q (or click the Terminal window and hit Ctrl-c) to terminate the program.
Troubleshooting note: If there is something wrong and you’re sure it isn’t hardware related (Did you check the batteries? Are there loose wires? Did you forget to plug in the USB cable?), then you can always fall back on the Universal PyCKBot Troubleshooting process.
Inchworm.py
from joy.decl import *

ROBOT=dict(required=[0x80,0x81,0x82],names={0x80:"headfoot", 0x81:"mid", 0x82:"tailfoot"})

def on_K_a(evt):
	app.robot.at.headfoot.set_pos(9000)
def on_K_s(evt):
	app.robot.at.headfoot.set_pos(0)
def on_K_d(evt):
	app.robot.at.headfoot.set_pos(-9000)

def on_K_z(evt):
	app.robot.at.tailfoot.set_pos(9000)
def on_K_x(evt):
	app.robot.at.tailfoot.set_pos(0)
def on_K_c(evt):
	app.robot.at.tailfoot.set_pos(-9000)

def on_K_i(evt):
	app.robot.at.mid.set_pos(6000)
def on_K_o(evt):
	app.robot.at.mid.set_pos(0)
def on_K_p(evt):
	app.robot.at.mid.set_pos(-6000)

### You need this at the end. It starts the robot and runs your code

from joy import runFlatScript
runFlatScript(locals())
Evolving your Inchworm
This is not an especially good piece of software, or an especially good robot design. Little to no real thought (let alone research or experimentation) went into determining the dimensions of these body components or the parameters of the code. It is simply an easy jumping off point.
When you walk, you hardly think about coordinating your steps, let alone focus on firing off individual muscles or muscle groups. Can you modify this code so the Inchworm walks more like you, and less like a crippled abomination that should have been a thing of beauty? Start by revising the code so that a single keystroke results in a single complete step forward. After that, can you make it so that a single keystroke makes it walk until a new input makes it stop? Or walk backwards? Is there a better way to handle turning?
Similarly, over uncounted aeons nature has produced many types of creepy-crawling insects—some quite stunning. Nature has yet to settle on the “best” body layout for an inchworm. Should this Inchworm’s legs be shorter? Or longer? What about the tiller? And why should this worm have only three segments? What else can you do with the foamcore, servos, and Controller pin-outs you have left? Is there anything else kicking around your workbench or junk drawer that should be part of a walking robot?